Ok, just ignore the photo from yesterday where I was trying to get the hang of stamping again. Turns out, all I needed was a polish that stamps well and a bit of practice!
The problem is, I was stamping onto Glitter Gal holographic polish with metallic polish, so it was HORRIBLE to photograph! But two photo sessions and much time in Photoshop later, I have a few shots to show you how well the stamps work.
Keep in mind, I've heavily edited the images to make them viewable. But I haven't touched the nail parts of the photos, and I've got a before shot to show you the difference.
Ok, enough yapping... let's get to the pics!
 |
| I should have moisturized, but I was so excited... |
This shot actually shows four stamps, although it's hard to tell. The first finger (from left to right) has a flower in Heaven Creamsicle, but it doesn't show from this angle. Trust me, it's pretty.
The middle two fingers are a old franken I made myself. It is GORGEOUS, and even more clear than it seems in this photo. Seriously, I'm LOVING this polish for stamping!
The pinky has a portion of a butterfly, but for the life of me I can't remember which polish I used for it. My memory sucks...
 |
| So hard to see... *sighs* |
I stamped these fingers first, so I was still getting the hang of it again. Still, you can
kind of see what's going on here. The pinky is stamped with NYX NP 47 Le Prive, which is a really gorgeous duochrome, a slate/steely blue polish that shifts to a pale gold. Melissa at
The Daily Nail sent me a care package of a bunch of fun gorgeous polishes around Halloween, and this is one of the beauties she included. Love it! I bet it'd be STUNNING over black!
The middle two fingers are stamped with a Maybelline matte metallic gold polish, and although you can't quite see the designs in this shot, the ring finger has what appears to be bamboo, and the middle finger has a portion of a rectangle with cutaway flowers in it. This looks really fun and funky in person, and I can see using the "full nail" designs like this in the future.
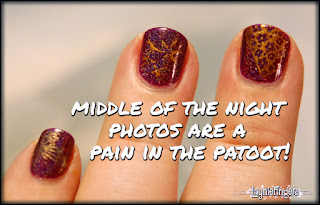
Ahhh, here we go. This is a pretty horrible shot, as it (like the others in this post) was taken in low light using available light instead of flash, because I was trying to keep the holographic reflectiveness of the Glitter Gal Purple Holographic from totally obscuring the stamping. With lots of color correction and a bit of Photoshop magic to make my cuticles not look so disgusting, we've got a somewhat presentable photo.
Unlike the original. This is a great example of how I edit my photos. I will always tweak the color balance on my pictures to try and reflect something more resembling what I see, rather than what the camera sees. I have no problem cleaning up the raggedy cuticles I always seem to have, because really, who wants to see that?
But I do NOT retouch the actual nail art part of my photos. That's a point of pride for me, really... I want you to see what I did, not what I wish I'd actually been able to do. When I do make Photoshop mockups, it's always clearly marked, and it always looks like Photoshop instead of my real nails.
I'm not the best nail artist by far, but I do want to present MY work, not some fantasy drawing. So... yea, that was quite a rant... oops. :D
Anyway, the bottom line is that I LOVE THIS STAMPING SET!! Honestly, if you have any interest in getting into stamping, this is the way to get started. Check your local stores for their as Seen On TV products, and you can play too! And again, please share what you've done. I wanna see!
Til next time!
Blah blah was provided by the manufacturer for consideration.


