Showing posts with label Seche Vite. Show all posts

Thursday, October 27, 2011

Broadway Nail Dress with a twist, and an explanation of where I've been

Wow, two posts in one day! This might become a habit again! Consider this a sign of improvement!

Gee, I didn't realize how wordy this post would be
til I got started writing! Sorry for the mental vomit!
Some of you may know that I've got fibromyalgia (along with a few other weird-but-not-deadly issues), and that I end up seeing a lot of doctors. Because my fibro pain got to such a debilitating point,  I eventually started going to a chronic pain management clinic. Hands down, it's the best decision I ever made, and one of the hardest ones.

Like many other people, I had the wrong idea about what a pain management clinic was. I imagined it to be basically a place to go get pain pills, and that's not what I wanted. Overall, I wanted to manage my pain, lessen it, but I didn't want to commit myself to expensive drugs and narcotics and who knows what. I was terrified I'd become an addict, that people would know what I was doing and look down on me for it.

Then my pain got to the point I couldn't function anymore. Couldn't dress myself without assistance, couldn't take a bath without help, couldn't cook dinner. I fight really hard not to whine too much and try not to bring people down, but I reached a point where I realized that frankly, life as an addict would be better than what I was going through and I had nothing left to lose. I called the clinic my general practitioner recommended.

Imagine my surprise when I found out that no- they don't like handing out pills any more than I like taking them. They've supported my choices to experiment with exercise, diet changes, weight changes. They've given me medication to control the pain when I need it, and have helped me taper off the meds now that I don't. And suddenly, I'm living in a world where even though I'm seriously out of shape and some days I hurt too much to do things, I have more days when I don't hurt too much to laugh with my family, or go on a picnic, or just snuggle in bed while we watch a movie.

Those things? For me, those are what make life good. They're the important things. The rest of it's just stuff, you know?

So- why have I been gone the last few weeks? Long story short, I've been taking methadone for pain management for about 2 years now. It worked, it was cheap, and since I don't have insurance it was the best option at the time. And now that my pain has improved, I've been very slowly tapering down for 5 or 6 months. Finally, I took my last dose 2 weeks ago, and it was so incredibly momentous...

... and crappy. Did I mention crappy? Yea, it's improving now, but after having taken this daily for 2 years, it wasn't a fun process. Add to it a bad reaction to an anxiety med I'd started the week before and I spent a few weeks pretty depressed and miserable.

However, it's improving, so I'm excited about that! I'm getting excited about life again, which feels absolutely amazing, and as a result, I'm hoping some of this will spill over into blogville. Keep an eye peeled, things might get fun soon!

Anyway, the reason I wanted to share the talk about doctors is because a funny thing has happened! My team at the pain management clinic have gotten to know me over the past couple of years, and now whenever I go in, several people will come up to me wanting to see what fun nail art I'm wearing! Some of them even read this blog! (Hi!! *hugs*) It's a wonderful feeling, knowing that even though I may be having a rough time, I can still bring a little bit of happy into their lives, so I find myself thinking about what I'm going to wear on my nails before every appointment!

For my last appointment, I wanted something fun and festive, but also sort of understated. (Ok, understated for me. Deal with it!) Also, I was feeling pretty gross so I didn't have a ton of energy to spend on my nails. So, I decided to break into a pack of Broadway Nail Dress sticker-thingies. Also, since I wanted a bit more flash, I decided to add some crystals from a limited-edition packet of Kiss Nail Art Paint. If I'm not mistaken, some of the kits still come with the sheet of french manicure guides and rhinestones- just check the back of the box when you get them.

I know, it seems like I use a lot of Kiss and Broadway products. But they're really good! Honestly, it seems like I reach for something from them any time I'm doing nail art, partly because they're affordable and available, but mostly because they're the best product to achieve my goal. There is SO much love in my heart for these products!

Ok, enough blabbing about that... There's not a lot to say about applying these. They're different from the nail polish appliques like Sally Hansen Salon Effects and Incoco strips. I'm not sure what these are made of, but they're almost like a plastic film. They don't seem to stretch as well as the nail polish strips, but they're not harder to put on. It's simply a matter of select a strip that looks just a bit wider than your nail, pull it from the paper, line it up with your cuticle, and apply.

Such a mess! You can even see one
of the leftover bits inside!
However, I do have one tip for application. When they show the nail file going straight down at the end of your fingernail, they do mean straight down. If you let it go at all toward your cuticle, you will end up with a tiny streak of bare nail at your fingertip. It's not pretty, so be very aware of how you're holding the emery board to remove the extra. Go slow and it should work out fine.

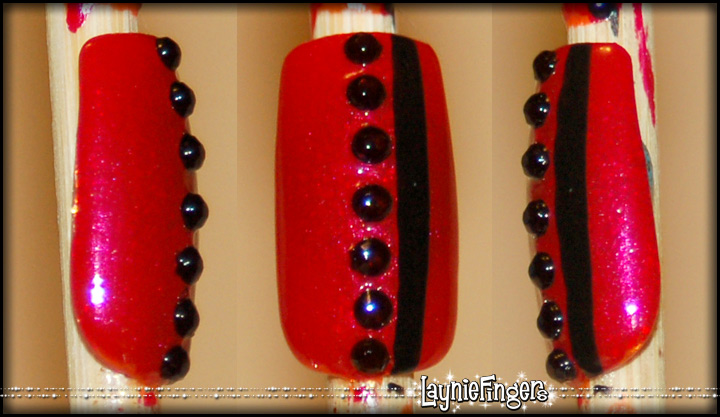
Once they were all on, I decided to add a bit of bling with the rhinestones. Since this pattern reminded me of netting, I decided to put a crystal at each joining. I started with a larger one sort of in the center, and then as I worked my way out, I used gradually smaller stones.

They turned out looking almost like dewdrops! I really did like the look, although it was sort of odd. I topped everything off with a coat of Seche Vite and called it finished! Unfortunately, these were almost impossible to photograph!! They're so shiny, with a sort of brushed-silver background and a metallic silver net pattern. Gorgeous, but my camera HATED me!

I did get a few pics to show sort of how they looked, but it was rough! Still, in person I liked them a lot. There was just enough interest to keep me happy without being all BOOM POW RAINBOWS IN YOUR FACE! The ladies at the doctor's office seemed to like this manicure as well, which is also fun. And next time?

Who knows. Maybe a monster manicure, or turkeys, or... who knows? I'll figure something fun out. I always do!

Can you believe this picture (like all the others) gets even bigger if you click it? :D
So, long story short- if you're fighting with chronic pain, you do have options. Talk to your doctor, talk to your family... even if it feels like there's no hope, you might be surprised. And you are definitely not alone.

Til next time!


Items were provided by the manufacturers for consideration.
See my disclosure statement for more information.

Thursday, June 23, 2011

Animal Print Week- A Painterly Zebra of a Different Color

Click this photo to see a close-up view of
the loose, painterly quality of the print.

Another update for animal print week! (Also, animal print week may carry over to next week, since I seem to be failing at updating daily!) Today's how-to is a somewhat painterly approach to a zebra print.

Instead of making a zebra print with very crisp lines, I wanted something a bit more loose and zebra-inspired. Because of this, I didn't even bother to look at any photos of actual zebra print. Instead (since I've painted zebra print quite a few times) I just started in painting.

Exact polish colors and brands aren't really important here. Instead, pick out three or four shades that you think will go well. I went with a bright almost-neon warm red-violet, a cool lavender, a very pale grey and white. These colors are similar enough to work together, and yet different enough to really stand out. The cool lavender really pops against the warm background.

I began with my standard base coat (Qtica Nail Growth Stimulator),  then 2 coats of the red-violet background color. Once this was grey, I loosely painted in the base stripes. I then added the lavender bottom lines on, then the white at the tops of the stripes. A quick coat of Seche Vite then leveled the art out, making everything seem pulled together.

Click this image to see it full-size!
Tell me- do you prefer a sharp, crisp zebra print or do you like my looser, zebra-inspired print? Let me know in the comments!

Til next time!

Some products may have been provided by the manufacturer for consideration.
See my disclosure statement for more information.

Tuesday, June 21, 2011

Animal Print Week: Pink Leopard Print-ish

Wheee! I can't believe I missed Monday, but I was having technical difficulties. Whatever... I'm here today with a fun animal print-inspired nail design that I hope you love as much as I do! It's super easy, too, and I couldn't help but call it Glitterlicious

I have to admit, it's not exactly leopard print. I showed it to a good friend who wasn't sure exactly what animal would have this design, but who cares, right? It's hot pink and cool blue, and it's perfect for summer!

This design starts, like all the others, with a coat of your favorite base coat. This makes sure your art lasts longer than your favorite sitcoms. I've been using Qtica Natural Nail Growth Stimulator, and my nails have been growing like mad! They're seemingly stronger than ever, and they're growing longer than I think I've ever had them! YAY!

After that, you simply paint your nails in whatever color you choose for your background color. I chose a bright hot pink. Two coats should do it, but of course it varies based on which polish you choose.  Then comes the fun part!

To add the splotches, I used Sally Hansen's Nail Art Pen in Blue. This way I didn't have to worry about controlling a brush- I just doodled in vague spots from memory. I probably should have looked at a picture of leopard print, but you know what? This is inspired by... I can do it any way I want to! :D

One tip to remember- be sure your background color is completely dry before you try and use the Sally Hansen Nail Art Pens. Otherwise, they just don't work, and that's no fun at all!

Once my splotches were dry, I decided I wanted a bit more color. I dug around in my nail art box til I found my Kiss Nail Artist Paint in Soft Purple. This was just the ticket! I used the thin artist brush to just brush a thin line of color right under the bottom sides of each little blob. I thought of it as if each blob were a 3d shape and I were shining a light from the base of the nail, and everywhere that light would hit I put a touch of purple.  Easy- remember, you can't really mess it up. Even if you do, it's just nail polish!

When I finished with the purple, I realized it still wasn't ready. I knew what I needed: GLITTER! I grabbed my superfine glitter in royal blue, tapped out a small bit into a plastic cup, and poured just a bit of clear nail polish on top of it. A bit of mixing, and it was perfect! I dabbed this custom glitter polish over the blue splotches, loving the way the glitter caught the light and made the whole design pop!

After that, it just needed a coat of Seche Vite and it was done! I love the finished result, and I'm seriously tempted to do this on my own nails now! (This was on a false nail, or I'd show you a whole set of them!) Check out the animation below for the how-to!


So, what do you think? Can you see yourself wearing this design? If so, let me know in the comments! I'd love to see what you come up with!

Til next time!
Some products may have been provided by the manufacturer for consideration.
See my disclosure statement for more information.

Thursday, June 2, 2011

Deborah Lippmann: Girls Just Want to Have Fun

Oh my goodness, I am absolutely loving this look. Let me start by saying that I'm really not one to wear corals... they tend to make my skin look kind of oogy. On other people coral looks amazing, but on me? Meh.

So I had a massive problem once I had Deborah Lippmann's Girls Just Want to Have Fun in my hands. It is such a gorgeous coral and I wanted to wear it! Something about this color just absolutely won my heart- it's pigmented, it's bright, it's all the wonderful things about a hot summer day without all the ickiness of actual humidity and frizzy hair! I kicked some ideas around in my head, trying to figure out what I could do to make this color wearable for me.

Before long, it hit me. This was dying to become a Hawaiian print! I've been stashing adorable little floral nail stickers away here and there in my nail art box, always wanting to wear them but never knowing how to do it without looking silly. I'm not sure I managed with this look, but I don't care... I love it too much. The beauty is that even if you're all thumbs, you can do this look too!!

The most important part of this look for me was variety. I used four different sheets of floral stickers in colors that worked together, hoping to make a playful mishmash of pattern that worked together as a fabric, almost. It's not as good as it could be, but every time I see my nails, I giggle a bit to myself!

It really is as easy as picking the stickers off their little sheet and placing them onto your nail wherever you like! Rather than try and keep all the stickers complete, I cut some in half and some in thirds so that the pattern seemed to continue past my nails. I used a pair of nail scissors to cut the stickers and a pair of tweezers to place them gently. After that, a couple of Seche Vite pulled everything together, giving it a coherent look.

However, it still needed something else... something fun, something silly. A quick dig through my nail art box gave me just the thing- Love My Nails Dazzling, a super-fine glitter that made the whole design pop! One more coat of Seche Vite finished it off, and now my nails are perfect for a Louisiana Luau, complete with ice cold beer and a pretty flower in my hair! Now... to find that luau... ;)

Let me know if you try this look. I've love to see photos! This could work with any bright base color, too- yellow, pink, orange, even lavender would be gorgeous! Relax, have fun with it, and remember it's only nail polish!

Til next time!


Polish and stickers were provided by the manufacturers for consideration.
See my disclosure statement for more information.

Saturday, April 16, 2011

Blast from the Past...I'm in the mood for a bit of Heaven!

I love this polish, it totally helps cheer me up! I
need a backup of it!!
Have you ever had one of those days when you're just moody as heck for no real reason¹, and every time someone speaks to you, you either want to scream at them or curl up and cry? Yea, me too, only mine seems to be one of those weeks. Very frustrating!

I'm taking a new medication for my fibro, and unfortunately it's got a list of side effects that's pretty unnerving: simple ones like blurred vision, dry mouth, weight gain, and drowsiness; and more upsetting ones like back and forth eye movements, chest pain, fainting, loss of coordination, memory loss, speech changes, twitching, and worst of all- "new or worsening mental or mood changes (eg, depression, agitation, anxiety, panic attacks, aggressiveness, impulsiveness, irritability, hostility, exaggerated feeling of well-being, restlessness, inability to sit still)."²

Now, normally I wouldn't be too concerned about this. There's just one little thing... I took another drug that's very similar to this one and ended up having extremely bad "mood changes." I won't go into it, but let's just say the doctor got me off of it really quickly after we explained what happened. Knowing that, my doctor and I discussed whether I should even try this drug, and we're in the process of slowly building up to a theraputic dosage of this drug. Right now, I'm taking the dose they'd give an unwell 80 year old woman. My doctor said that I won't notice positive results yet, but hopefully if I do react badly, it won't be nearly as bad as before.

Unfortunately (it seems I'm saying that a lot in this entry... ah well...) my doctor left the clinic two months ago. My last visit was with the nurse practitioner (whom I absolutely adore), and Monday I'll get to meet my new doctor. I'm a bit anxious about this, bu I'm optimistic, and if it doesn't go well, I still have options. I'm just afraid I won't be taking this medicine any longer, and I really was hoping it would work well for me.

That's a heck of a long introduction to explain why I'm in the mood for happy things!! However, between overdoing it on our little vacation the last couple of weekends and this new medicine, I'm one grumpy camper. I'm working very hard not to snap at the people around me and not to be a total pain in the butt. To help with this, I'm finding myself doing little things to cheer myself up.

For example, I am writing this blog wearing my pink penguin pajamas, with the absolutely adorable patch on the shirt that has a sweet little penguin dressed in a lime green scarf and hat and absolutely covered in green microglitter! The glitter doesn't even come off, it's mixed into a clearcoat, so it's not scratchy or anything! I love these PJs more than I should, probably, considering I'm a thirty-something mom!

Also, I've been experimenting with nail colors. I've been a bad blogger and not taken photos, but you'll have to forgive me. With the fibro acting up, I've had a hard time carrying the camera, much less dealing with Photoshop. You'll have to make do with photos from the archive and vivid descriptions, sorry!

Two days ago I painted my nails again. I was in the mood to experiment, so I started with Sally Hansen Salon Reddy to Mingle. It's a sheerish red with a very slight shimmer that's really intense, and slightly on the warm side. Absolutely gorgeous, and one coat did all I needed. I decided I wanted to warm it up even more, so I added a coat of Sinful Colors Let's Meet, a sheer shimmery yellow that I absolutely adore. Between the two, my nails were a very nice slightly streaky orange that I really liked. I wanted to up the sparkle factor, though, so I added a coat of Revlon Glimmer Gloss in Grapefruit Glimmer.

The final result was a gorgeous reddish-orange with super sparkle. I don't think I could have gotten any more sparkle without adding glitter! I liked the way the color was built up of sheer colors, because it wasn't that flat opaque look you sometimes get. There's nothing wrong with that, but this was interesting, and you should know by now how much I like interesting!!

Today has been a busy day, and I managed to twist my knee while I was out and about. I'm icing it now, and I decided I wanted a bit more ... more. So, I dug deep into the polish vault and dug out one of my all-time favorites- Ruby, by Heaven Nail Lacquer. I started with a base of Sally Hansen Teflon Tuff Nail Coor in Red Forever Creme. This polish is super-old, I don't even remember when I bought it! However, it's still a fantastic polish, and one coat is all I need. I topped that with two coats of Ruby, and oh my goodness, does this sparkle. This is definitely doing the trick, although I've got all sorts of other ideas now for glitter polishes.

And of course, I topped them off both times with Seche Vite. I'm starting to twitch, because I'm almost out! Looks like I really need to get those Etsy listings up! C'mon brain, you can do it!!

So, that's my day, and my nails for the next few days. Let's hope my mood improves, so I don't have to tell my new doctor on Monday that this medicine is making me do all sorts of awful things. Cross your fingers for me, ok?


¹ I don't even get PMS anymore, so I can't blame that!
² Side effects copied from http://www.drugs.com
³ This was well before my polish obsession, back when I didn't know how to properly clean up my nails, or how to use cuticle remover. And I wondered why I had trouble keeping my polish on!
Trying new medication sucks. I don't recommend it.
See my disclosure statement for more information.

Monday, December 27, 2010

After the Rain...

If you've been reading Layniefingers for long, you won't be surprised when I say I love rainbows. It's almost obsession, really. I'm fascinated by the color gradients, watching one color shift into another. It's mesmerizing, and I adore it.

Today's design was created using three colors of acrylic paint. I blended them on the nail, using generous blobs of paint and a very quick back-and-forth motion with a thin liner brush. If I had a video camera I'd show you the process, but... well, to steal a quote from my mother, "If a frog had wings, he wouldn't bump his butt when he jumped." A coat of Seche Vite made the drab finish of the acrylic paints come to life and sealed them together under its glassy shine.


I  love this one. It makes me think of candy, or carnivals and fun carnival foods. What does it make you think about?


Wednesday, December 15, 2010

Happy Holidaze the eleventh- All Buttoned Up!

Hiya! Wow, what a day... this has been one of those days that I just can't quite seem to get the hang of.  I've been sleepy all day (go figure), but I managed to accomplish some things, and then went for a drive tonight looking at Christmas lights with my family. That was a lot of fun, except that I don't quite understand some people's holiday decorations.

I mean, take Santa, for example. I understand having lots of decorative deer in your yard, or multiple snowmen. But why would you have seven Santas spread out over a half-acre lot? I just don't get it... it's like there's the Santa by the driveway, and the Santa by the front porch, and the Santa climbing a ladder and the Santa patting a reindeer, and finally the psychotic Santa behind the house chopping up the bad little boys and girls who didn't realize that when they said Santa is watching, they really meant Santa is watching, and he knows if you've been bad!

I know, I digress. But I really do think some people overdo for the holiday. We saw some homes that were so bright it was almost like daylight, with thousands and thousands of lights and animated decorations and just so much STUFF! It seems like overkill, but this is probably just me being a total Scrooge. But seriously- if you have more than one Santa, could you tell me why? What the reasoning is behind it, because I honestly don't get it!


All that babbling aside, here's today's nail art. I'm reminded of a red wool coat with pretty jet buttons up the front! This is (again) a very simple, very bold graphic look that really is easy to do. As you can tell from the graphic, it's a very quick look to put together.
  1. Apply base coat.
  2. Two coats of polish of choice- I chose red.
  3. Apply a black stripe of polish with a thin brush. Let dry.
  4. Apply a line of clear polish down the center of your nail. Then place the black stones in a line alongside the black stripe.
  5. Apply a coat of Seche Vite to secure and protect everything.
So what do you think- is this a look you think you would wear? How would you change it?


The black rhinestones were provided by Viva la Nails for consideration.
See my disclosure statement for more information.

Thursday, December 9, 2010

Happy Holidaze the seventh- Sweet nothings!

Ahhh, the holiday season, when people hang all sorts of candies from a tree, so that you can casually nab a snack as you wander by! Oddly enough, I've never been a fan of mint but I think the patterns on mint candies can be adorable. Candy canes, starlight mints... the crisp white really sets off the red & green stripes. That's the inspiration behind today's nail art.

I just want to lick these!!
This is the simplest nail art ever. Two coats of white polish, then use a striping polish in red and/or green. I used the lush red glitter striper from Kiss's limited edition holiday set, along with a green Art Deco striper from the Dollar Tree. While a deeper green would seem more Christmassy, I think the lighter green really does give this a candy feel.

As always, a coat of Seche Vite tops everything off to make this smooth and glossy. Other top coats aren't bad, really, but Seche Vite is thick, dries exceptionally quickly, and self-levels so that any lumps and bumps get covered up. It's SWEET!

Kiss Nail Art Nail Paint was provided by the manufacturer for consideration.
See my disclosure statement for more information.

Happy Holidaze the sixth- Laynie loses her mind with glitter!

I'm taking a break from the batch of nail tips I decorated, but don't worry. You're still getting the holiday nail art, but today it's more of a cautionary tale, although I'm not quite sure what I'm cautioning you against. I think it's a simple Don't do this, because it isn't pretty!

But first, let me show you yesterday's adventures! I finally sold the monster nails, so I treated myself to a sample pack of glitter! Unfortunately, it came packaged in cute little baggies, which doesn't work for me. I debated for quite a while in Michaels, trying to figure how I was going to store this stuff so that I could use it!

Then it hit me. I saw a set of paint pots for $2.75 hanging in the section with palettes and containers and things for painting. Have I mentioned I'm frugal? Yea, I don't want to spend $10 on something to store my $4 glitter, so this was just right for me! The only issue would be transferring the glitter from the packets to the pots, but I could be careful, right?

Right. The thing I forgot to take into consideration was that this is microglitter. It's so incredibly fine that it can waft into the air like a dust cloud, gently drifting and lazily gliding on air currents in the room. How do I know this, you ask yourself? Lemme tell you...

Because I'm so frugal, I wanted to get every last speck of the glitter out of the packages. I spent good money on that stuff, and I don't want to waste it! I cut the edge of the first bag off (emerald green, ine you were wondering, and haven't seen me since the incident!), gently tap-tap-tapped it into the pot, being careful not to spill any. Then, I lifted the bag up with the cut end pointing up, intending to tap it on my finger to pull down the glitter stuck to the edges of the bag. It worked perfectly while the bag was closed!

Unfortunately, I didn't think this through carefully enough. When I tapped the bag on my finger, instead of this causing gravity and inertia to pull the glitter on the edges of the bag down to the bottom it turned the bag into a very small bellows, sending a tiny mushroom cloud of green glitter directly into my face.  It felt like it was in slow motion, this tiny cloud expanding toward my face, enveloping my head in its sparkly green goodness. Except it wasn't quite goodness that enveloped my head. It was glitter, and glitter never goes away.

I won't waste your time with the tales of how I finally got all the bits of glitter picked up and shaken out of my hair. Let's just say it included lots of masking tape, lots of cursing, and lots of my family pointing and laughing at me. I deserved it, clearly, but really... how was I supposed to know this was going to happen?

I finally got the glitter packed away and most of the random glitter fallout picked up. What am I saying... I know I'm going to be finding glitter in random places for the next 15 years. Glitter is like herpes- once you get it on you, it never goes away.

And on to the nail art, since I've shared my secret shame. Unfortunately, this isn't much less embarrassing. I had visions of a cute, sassy Konad look that would be fun to wear. What I ended up with was more like the 80s threw up all over my nails. It's not horrible, granted, and it's better than I could do when I first got the Konad stuff. But still?

This isn't good. Not by a long shot. And the more I did to it, the worse it got.

It all started with the package I won from Scandalously Polished over twitter. I had no idea what to expect, so I was absolutely BLOWN AWAY when I saw it was 10 polishes and 4 nail foils! CRAZY! She is super awesome, and if you haven't seen her blog, then scoot over right after you read this and say hi!

In that package was a polish from H&M called Bella's Choice. I'm going to assume this has something to do with that vampire thing going around... Dusk or Nightfall or Twilight or something, yea? Whatever... it's an absolutely gorgeous turquoise creme that I couldn't wait to put on. I was hoping it would look wonderful on me!

In truth, not so much. It made me look somewhat ill. My husband looked at it and called it "that puke polish you're wearing." I wore it grocery shopping and the cashier caught sight of my nails, did a double take, then quickly looked away with a strange look on her face. I think she didn't want to ask if I was feeling ok, but you could tell she didn't think it looked good. I like the color, though, so I figured maybe if I stamped over it, I'd be able to wear it.

Enter the second color she sent- H&M Goddess on Stage. This polish is magnificent, y'all. I really don't even have the words to describe how amazing this is. Creamy, gorgeous, just luscious. I thought it would play nicely with Bella's Choice and make something wearable for me. But it actually stamped sort of sheerly, and in my stamping ineptitude I ended up missing spots and stuff.

No big deal, I thought to myself, I can just fix those spots with a brush. Sure, except that I couldn't copy the consistent thinness of the stamped image, leaving me with heavy purple spots on the edges of the print. Oh yea, that looks GREAT.

Maybe I can add some color to the spots, to draw the eye away from the dark edges, I continued thinking to myself. I pulled out my pink and white creme polishes and added some to the dots, but that wasn't enough, in my opinion. My husband did think it made everything look better, even better than the stamp alone. "It covers the puke nicely!"

Thanks hon. I feel much better now.

As a finishing touch, I added lime green and yellow creme dots to the remaining spots and covered it all in Seche Vite. And you know what?

It wasn't horrible, but I don't think I'll be wearing this one again. There are just too many things here that just didn't work well together, and I'm just... no. No. Never again!

Do you have any horrible stories about manicures that just didn't work as well as you hoped? I'd love to hear them to make me feel better about this one!


Wednesday, December 8, 2010

Happy Holidaze the fifth- Five Golden Rings!!

Boy oh boy, am I glad I did a bunch of nail art in advance. I had to cut my nails back tonight, and I'm back to nubbins, unfortunately... they're so short they aren't even close to the tips of my fingers. *sighs* Stupid breaks and splits. Hopefully they'll be healthier because of it, though...

So, I don't know about you, but sometimes when I go to a holiday party, I have no desire to paint my nails in red and green. Sure, it's a Christmas party, but the red and green can stay on the tree! Instead, I'm going to show you an easy Konad design that I absolutely love!

Ok, it's dots instead of rings, and there are more than five. But they ARE gold!
First, I painted my nails with a basic black creme polish. Pick one, any of them will do. Two coats, then once they dried I pulled out my  Maybelline Express Finish in Matte Gold for stamping. Doesn't it do a great job? Unfortunately, I don't remember quite which Konad plate this image is from, but really you can pick one you like.  I chose this one because of the blank space at the top and the bottom.

First I used a tiny paint brush and a dot of the Matte Gold to take the lines all the way to the edge of the nail at the top and the bottom. It's not quite perfect, but that's ok- nobody is going to be looking that closely at your nails. I'm just too obsessive to leave them unconnected.

Once the edges were tidied up, I then pulled out my Sinful Colors All About You, which is an absolutely delicious gold-toned glitter that has multiple sizes and multiple tones of gold. I absolutely adore this glitter, because it's sparkly enough to add a kick, but still small enough to stay sort of subtle, at least as far as glitter goes. :D

I added All About You to the top and bottom sections of the nail, adding to the look and sort of making things look finished. I feel like it really did take a design that was pretty and make it pretty awesome! Then I finished things off with a coat of Seche Vite to protect everything and I called it DONE! Easy as can be.

Now, if only I had somewhere to wear it to! Ah well, soon.

Sunday, December 5, 2010

Happy Holidaze the third! A simple snowflake design...

EEEP! The night got away from me, and I totally missed posting the blog tonight. I feel so guilty, but I had a lot of fun going out with my husband and my son, so I guess it was worth it.

It's a simple design today, one inspired by the weather up north. Living in Louisiana, we don't often get snow. Instead, we have weather that bounces back and forth, often seeing 85° one day followed by 35° the next. That actually happened last week, and let me tell you it's NO FUN! How can you get in the holiday spirit when you're in shorts and a tee shirt, sweating your tushie off?

I decided I wanted something pretty to remind me of the first snow we saw while living a bit north of here. We'd gone out in the night to watch it fall- enormous fat, fluffy flakes lazily drifting down to dust the grass. It was a slow fall at first, with huge flakes scattered in the night, standing out starkly against the dark sky. Later that night, the snow fell hard and covered the world with a soft blanket of white, the night absolutely silent as the snow muffled the sound. It was magical, and waking up that morning was so memorable. We walked outside and just looked around, feeling as if we'd been transported to a magical winter wonderland in the night.


This gives you a hint of where my mind was when I did this design, yes? I started with two coats of Sally Hansen Ultra HD Laser, then let that dry. I then pulled out my stencils that came with the limited edition Kiss Nail Art Nail Paint three pack. It's got such adorable stencils for the holidays- a candy cane, a christmas tree, snowflakes and gingerbread men... lots of holiday-themed cuteness! I chose this snowflake, and as you can see they're reusable! I then added a small rhinestone in the center of each snowflake from a pack of adhesive stones by Kiss, then topped with a coat of Seche Vite to smooth everything out and protect the art.

The stencils are super-easy to use. Make sure your polish is dry, then pull the stencil of your choice off the plastic sheet it comes on. Place it carefully on your nail, making sure to press it down thoroughly. If you don't, there's a chance the polish could seep under the edges, ruining your stencil. Apply your polish, then while it's wet lift off the stencil. (I haven't tried letting the polish dry before lifting the stencil off- I'll try that tonight!) Let the stenciled area dry completely, then add a layer of topcoat to protect it.

Once I pulled the stencil off, I'd place it back onto the plastic it came on, then clean off the wet polish with a cotton ball soaked in polish remover. Then I'd place it onto the next area again and start again! The stencils really are lots of fun to use!

Now... let's see if I can get some sleep before tomorrow. I hope your Saturday night was as much fun as mine... what did you do for the evening?


The Kiss Nail Art Nail Paint set with stencils was provided by the manufacturer for consideration.
See my disclosure statement for more information.

Friday, December 3, 2010

Happy Holidaze the twoth!

Wow, I am absolutely blown away by the response to yesterday's post! You guys really like this nail art thing, don't you? Since you don't seem to mind me doing a single nail along with a demonstration of how it's done, I may try and see if I can do more nail art, even when I'm showcasing new polishes or whatever. I think that could be doable... what do you think? Worth the effort? :D

Today's holiday nail art is something for Hannukah. I have so many Jewish friends, and I absolutely love how blue and silver look together. That made today's nail art almost do itself!


As always, you can click the picture to make it bigger, if you'd like to see more detail. One thing I've found myself worrying about while doing nail art is the need to make things perfect. But if you look closely, you'll see that this is far from perfect- the dots aren't all perfectly round (I still don't have a dotting tool- shhh!), my stripes are irregular and sometimes overlap. But it's still pretty, and the whole look works well together as a whole.

So don't be afraid to try something like this. It really is a lot easier than you would think. Be patient, don't try to go too fast, and remember to brace your hand with your little finger while you paint. That step alone can make painting so much easier!

Also, like yesterday, I have an animated gif to help you visualize the steps of putting a look like this together. I'm trying something a bit new with it- I've labeled the steps to help you see what's going on, because there really is no good way to paint glitter. :D

To recreate today's nail, you'll need a few supplies:
  • base coat
  • a blue polish of your choice
  • white and silver stripers OR
  • white and silver polish & a skinny brush
  • clear polish to adhere glitter pieces & rhinestone
  • dotting tool
  • a manicure stick (for placing glitter & rhinestone)
  • silver glitter
  • a rhinestone
  • top coat
  1. Base coat. Always do a base coat.
  2. 2 coats of your background color- blue, in this case. For this nail, I used Sally Hansen Ultra HD Laser, but feel free to use any deep blue you like.
  3. Once your background is dry, paint white four slashes across the nail starting from the bottom corner. They fan out like a flower, almost. I used my Art Deco Illustration Nails paint in white.
  4. Use your dotting tool to paint white dots between the slashes. Do as many as you like. At the outer edges, I only had room for 2-3, but I did 5 on the inner sections.
  5. I decided the design needed a bit more punch, so I added silver stripes along the bottoms of the white stripes. Just use your striper (or your striper brush and your silver polish) to paint slashes along the bottoms of the white ones. I used my Art Deco Illustration Nails paint in silver.
  6. Once the white and silver are dry, sprinkle a tiny bit of glitter onto some paper. Paint a small amount of clear polish onto the first silver stripe, then place single glitter pieces in a line along the edge. Use the manicure stick to pick up and place the glitter pieces one by one. Repeat along all the silver stripes.
  7. Use a bit more clear polish at the base where all the stripes begin. Place a single rhinestone on top, covering the junction and dressing up the look.
  8. Let everything dry a bit, then coat with your favorite top coat. I used 2 coats of Seche Vite.
Repeat this for as many or as few nails as you like. It's a bit tedious, but it really isn't difficult. The main thing to remember is that you can do it if you practice! And even if it doesn't work out (believe me, not all of mine are keepers!), it's just nail polish!

You could customize this in several ways. First, you could change any of the colors and still have it look gorgeous. I can see this being downright amazing with black, silver, and red! You could also skip the careful application of glitter pieces and instead use a glitter striper. Instead of the rhinestone, you could put a big dot of glitter, or a nail decal. Nail art is endlessly customizable, and you should never be afraid to change things up.

I hope everyone has had a great week, and that you're heading into an even better weekend. Give someone something to smile about today! ♥

Monday, October 25, 2010

Tips & Tricks- How to Restore Your Seche Vite!

If you're a fan of nail polish blogs, chances are you've read rave reviews about Seche Vite, the super-amazing quick-dry topcoat that smooths out bumps, dries your nail polish in 5 minutes flat, and makes your polishes look super glassy. I'll be honest- I didn't think a topcoat could be worth $10 when I read the reviews. Once again, I thought polish was polish, and didn't see a reason to spend $10 when I could buy a topcoat from Love My Nails for $1.

Like I said in my last post, I'm frugal.

Then I worked on a set of nail tips that needed to be leveled out, so I splurged on a bottle. I figured hey, once I sell them I'll get the money back, so it's worth it. And I was amazed at just how different this top coat really is. Then I used it on my own nails as an experiment and was astonished. It really is that good!

Unfortunately, as I continued to use it, I found out what everyone else already knew: as you use it, it gets thicker. And thicker. And thicker. It gets so thick that eventually you can't use it, and it does it quickly. By the time I'd gotten halfway through my bottle, it was like trying to paint my nails with molasses!

I was absolutely disgusted. What's the point of spending $10 on a bottle of topcoat if it's going to be unusable halfway through! It's a total waste, I thought. I decided to use my nail polish thinner to try and salvage what was left in the bottle, and while it's usable, the magic is gone. It's no longer the amazing topcoat it was.

Then I learned something amazing. This morning I was chatting on twitter when @the_asian_girl told me her secret: Seche Restore. This isn't a solvent that thins polishes. Instead, it actually replaces the volatile chemicals that have evaporated from the bottle of Seche Vite, restoring it to its original magical state!

Do I even have to tell you how excited this made me? Seriously, I am absolutely giddy. This means I am once again willing to buy Seche Vite because I'm not going to be wasting half the bottle! I have no idea how I managed to miss this information, but I'm so glad I learned when I did!


Sunday, September 19, 2010

New Discoveries- Candy Foil Nails

I have a problem, I think- I'm always looking at things and thinking, "I could use this for something." I have several boxes of craft goodies that I'm holding on to, knowing that I'll use them for something one of these days. Sure, some people call it hoarding- I call it recycling! ;)

Seriously, though, I've had three Reese's Peanut Butter Cup Minis wrappers in my nail art box for several months now. At the time I saved them, my family thought I had totally lost my mind! I wasn't sure what I would use them for, I just knew that I would use them. Then a couple of weeks ago I got an invitation to be part of the BzzCampaign for Elmer's CraftBond adhesives and X-ACTO cutting tools.

I cannot even begin to tell you how quickly I hopped over to sign up. I was giddy, and couldn't wait to see what they would send. Well, I wound up receiving my package yesterday, and boy, was it fun! Included were two pairs of decorative edged scissors, a corner rounder, and various adhesives. But the scissors are what excited me. As I opened the package, I was hit by a moment of inspiration. Suddenly, I knew what I would be doing with those candy wrappers... they were going to become foil strips for my nails!

The first thing I did was smooth out the foil wrapper as smooth as I could. That worked nicely, and I was left with a slightly-crinkled foil that was really pretty. Then I tried to cut the wrapper with the scissors- it didn't do well. It sort of shredded the foil into things that wouldn't be very useful. However...

I remembered that in sewing, sometimes you have to reinforce a delicate fabric with a sturdy paper backing to stitch on it. I figured why not try it for cutting? I got a piece of plain typing paper, cut it slightly larger than the piece of  wrapper I was working with, and tried again to cut. SUCCESS! I had perfect cuts, making small slivers of foil I could then apply to my nails! I was excited and cut a lot of strips from half of a wrapper.

I also cut a few wider ones with one straight edge and one wavy edge. I applied one to a false nail with a thin thin coat of base coat, then used a small piece of plastic bag to smooth it down. This way I didn't get polish on my fingertips! The foil tended to slip a lot, so it might be better to wait for the base coat to get tacky.

Once it was tacked down nicely, I used an emery board to remove the edges of the foil by gently filing downward, cutting through the foil and leaving a smooth edge. I don't know how you could achieve the same look on natural nails, unfortunately.

Finally, I put a single coat of Seche Vite over it, and within 10 minutes or so I had a beautifully smooth nail with a gold foil applique. If you attempt this, be sure to wrap the tips, so that your foil won't try and peel up. I didn't have that problem, but better safe than sorry, right?

So there you have it- Candy Nails! I love the look, and will be putting some foil strips on my own nails soon enough. Currently, the strips are stored in small ziplock bags, with scraps in a separate bag. I think it could be fun to patch together tiny pieces of foil to make a fully-foil-covered nail! Besides, how many nail art techniques let you eat chocolate as part of it? Remember, if you try this, send me a picture, I wanna see it!

     ♥ Laynie

Elmer's CraftBond adhesives and X-ACTO cutting tools image provided by BzzAgent.com.

Thursday, September 16, 2010

Aiee, Poor Caribbean...


Oh dear. You ever do something pretty, and then just keep on going and destroy it? Yea, that's what I did here. The Caribbean Frost was pretty, but I got bored. Really bored. This is what happens.

See, first I grabbed my stamping kit. I have it all in a cute little bag that Kellie G. sent me. (If it wasn't for her, I'd still be stuck with the same single plate I had.) I dug through all the plates and decided to go with M78. It's a really cute pattern that I've wanted to use more than once, but never got around to using. Since I just got those gorgeous Maybelline Aluminum polishes, I decided to see how they'd stamp on this lovely shade of teal.

It was... pretty. It was fairly sheer, though. I wanted more! I then decided to fill in the cheetah spots with black and white. That was AWFUL!! Thankfully, the Sally Hansen Nail Art pens are water-based, and I could remove them without any damage to the stamp. It was really not something worth saving,unfortunately.

Then I decided to try the silver and gold. They were... better? I don't know. I'm not fond of this look, but I decided to keep it on for whatever reason. A coat of Seche Vite made it durable and shiny, and dried quickly as usual.

Oh, you may be wondering about the naproxen sodium in the photo. I've managed to damage my knee somehow, so I'm taking these around the clock to help with inflammation. I was amused at that bottle being closest to hand. I know, I have a weird sense of humor.

All in all, I don't think this is a horrible look. I just don't have long enough nails to make the best use of the pattern, and it ended up looking sort of disorganized. But it was the first time I used a whole-nail stamp and it turned out nicely. Also, I learned a lot about stamping and design. So overall, it was a great learning experience, right? :D

What would you consider one of your more educational nail polish experiences? Have you done a nail art design that just made you want to take it off and start over? Tell me about it in the comments! And coming up tomorrow, I got a special surprise in the mail that I get to share with you! See you then!

Sally Hansen Nail Art Pens were provided by their PR company for evaluation.