Some of these aren't the exact tools I use, but they're similar enough that I feel comfortable sharing them with you. Also, these are all Amazon links, and I am an Amazon affiliate. So, if you buy something through these links, I will receive a small commission. This will not affect your price, but it will help fund my crazy crafting. :D
Let's break down what these are and what I use them for!

This dental pick set is super useful for my Cricut crafts. The sharp tips on the pointy pick are fantastic at getting into tiny spaces when you're trying to weed a piece. The handles are a bit small, however, so you could add a rubber pencil grip onto them to help make it a bit more comfortable.
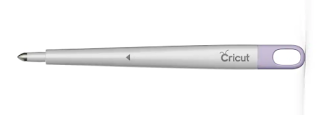
 The Cricut scoring stylus can be helpful. However, I think there are better ways to use it. Keep an eye on this blog, because I'll be sharing my scoring techniques soon!
This hole punch is amazing! I use it for all sorts of things, from making my own sequins and punchinella/honyeycomb ribbon to book binding to leather crafting to... well, just about anything you would want to put a hole in! It comes with 6 different hole sizes and is much, much stronger than your average office supply hole punch. I can't recommend this one enough!
 Ok, I'm fairly sure you guys know what this one is. But if you haven't gotten your Cricut Explore Air 2, this is a pretty good time to get it. It is freaking amazing, so versatile, and ... well, I may be a bit obsessed with it. However, if you're wanting even more versatility...
 ...you could go with the Cricut Maker instead! And in all honesty, as amazing as the Explore Air 2 is, the Maker is just worlds apart a better, more versatile machine. Yes, it's more expensive, but I think it's definitely worth the extra cash!
Also, you can't go wrong with more mats. I have several, and I find having multiple mats really streamlines my work flow. I can load multiple mats at once, so I don't have to weed a cut immediately before starting another cut. Plus, you need different mats for different media, so it's good to have at least one of each kind.

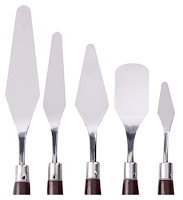
This palette knife set is something I wasn't sure I'd use that much, but holy cow do I love it now! I originally bought it to help me remove cuts from my mats, but I use it for so many things now! They're perfect for mixing paint. If I'm making my own glazes they work for measuring powdered pigments as well as for mixing those too. They spread adhesives beautifully... they're just such a useful tool for so many scenarios! I can't recommend this one enough.
If you don't have a craft knife, I highly recommend getting one. They are very useful, and for more than just cutting things! I've used mine for weeding teeny tiny bits out, for separating the back from a particularly difficult sticker... and for many other things I can't really remember at the moment. They're useful. You need one!

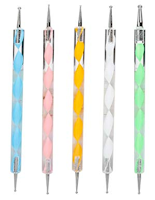
I also absolutely love my dotting tools. They too are useful in a multitude of situations! They work well for putting dots of paint on either projects or your nails, they're decent for mixing things, and I just might have turned one into a scoring tool for my Explore Air 2! Again, keep an eye on this space, because there will be a video coming of my technique for that as well.

I know, this doesn't seem like a craft tool. But trust me! It's awesome! First off, it's fantastic at helping get glitter off of your skin. Regular tape works too, but a lint roller is just so much more convenient! It works for clearing gunk off your mats too, or for getting glitter and things off of your craft table. My favorite tip, though, is that in a pinch, you can pull a fresh sheet off and use it as transfer tape for your small vinyl cuts!
There are times when we need to cut things manually, and this steel square makes that a breeze! Line one edge up with your paper, and your perpendicular cuts will be a perfect 90° every time!
Also, a bonus tip:
When you're cutting, never use a plastic ruler as a straight edge!
A steel ruler gives you a better edge without the risk of cutting into your ruler. I won't lie, I've damaged my share of plastic rulers by thinking, "It'll be fine just this one." It never is. Don't even try it! :D
On the other hand, a plastic t square ruler like this is good for drawing perfectly perpendicular lines. But remember: This is not a cutting tool!
This tweezer set also seems like something you wouldn't assume is a crafting tool. However, as I seem to be saying a lot, these things are useful in so many situations! They're great to have on hand, to assist in placing small or delicate accents especially.

Yes, Fabri Tac is intended for use on fabrics. However, it's also good for anything that's a bit difficult to glue. I specifically bought mine for mounting card stock onto glitter paper- none of the glues I had on hand would work, so I went to the internet for answers. The overwhelming answer to "what glue works on glitter papers" was Fabri Tac, so I bought some and OMG I'm glad I did!
The other glue I find I can't do without is Alene's Tacky Glue. It works so nicely on so many surfaces. I hate the idea of running out, so I always keep a spare in my craft room!
And if you're brand new to crafting and want a set of Cricut tools all in one space, Amazon has you covered. You can get a basic set of tools, or a set of tools for sewing, a set for weeding, or a set specifically for vinyl!
Wow, that was a heck of a post to write! I feel like I wrote a book...
I hope this list can help you out. Obviously you don't need everything on this list, but I listed the tools I use almost daily, the ones I keep on my craft table at all times.
Have I missed any tools you can't do without? If so, share them in the comments... I'm a bit tool-obsessed, so help feed my need! :D
Until next time...


