Showing posts with label Holiday. Show all posts

Wednesday, December 25, 2019

My favorite tools and things

Merry Christmas, Happy Holidays, and any other festive greetings that might be appropriate! I'm going to assume that some of you have received crafting goodies from the holiday gift exchange, which is awesome! However, sometimes you need additional tools, so I'm here to share my favorite tools with you!

Some of these aren't the exact tools I use, but they're similar enough that I feel comfortable sharing them with you. Also, these are all Amazon links, and I am an Amazon affiliate. So, if you buy something through these links, I will receive a small commission. This will not affect your price, but it will help fund my crazy crafting. :D

Let's break down what these are and what I use them for!


This dental pick set is super useful for my Cricut crafts. The sharp tips on the pointy pick are fantastic at getting into tiny spaces when you're trying to weed a piece. The handles are a bit small, however, so you could add a rubber pencil grip onto them to help make it a bit more comfortable.
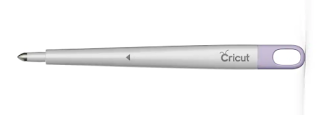


The Cricut scoring stylus can be helpful. However, I think there are better ways to use it. Keep an eye on this blog, because I'll be sharing my scoring techniques soon!


This hole punch is amazing! I use it for all sorts of things, from making my own sequins and punchinella/honyeycomb ribbon to book binding to leather crafting to... well, just about anything you would want to put a hole in! It comes with 6 different hole sizes and is much, much stronger than your average office supply hole punch. I can't recommend this one enough!


Ok, I'm fairly sure you guys know what this one is. But if you haven't gotten your Cricut Explore Air 2, this is a pretty good time to get it. It is freaking amazing, so versatile, and ... well, I may be a bit obsessed with it. However, if you're wanting even more versatility...

...you could go with the Cricut Maker instead! And in all honesty, as amazing as the Explore Air 2 is, the Maker is just worlds apart a better, more versatile machine. Yes, it's more expensive, but I think it's definitely worth the extra cash!


Also, you can't go wrong with more mats. I have several, and I find having multiple mats really streamlines my work flow. I can load multiple mats at once, so I don't have to weed a cut immediately before starting another cut. Plus, you need different mats for different media, so it's good to have at least one of each kind.
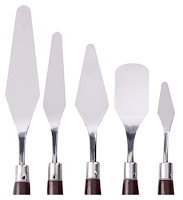


This palette knife set is something I wasn't sure I'd use that much, but holy cow do I love it now! I originally bought it to help me remove cuts from my mats, but I use it for so many things now! They're perfect for mixing paint. If I'm making my own glazes they work for measuring powdered pigments as well as for mixing those too. They spread adhesives beautifully... they're just such a useful tool for so many scenarios! I can't recommend this one enough.


If you don't have a craft knife, I highly recommend getting one. They are very useful, and for more than just cutting things! I've used mine for weeding teeny tiny bits out, for separating the back from a particularly difficult sticker... and for many other things I can't really remember at the moment. They're useful. You need one!
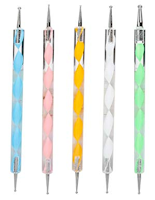


I also absolutely love my dotting tools. They too are useful in a multitude of situations! They work well for putting dots of paint on either projects or your nails, they're decent for mixing things, and I just might have turned one into a scoring tool for my Explore Air 2! Again, keep an eye on this space, because there will be a video coming of my technique for that as well.


I know, this doesn't seem like a craft tool. But trust me! It's awesome! First off, it's fantastic at helping get glitter off of your skin. Regular tape works too, but a lint roller is just so much more convenient! It works for clearing gunk off your mats too, or for getting glitter and things off of your craft table. My favorite tip, though, is that in a pinch, you can pull a fresh sheet off and use it as transfer tape for your small vinyl cuts!


There are times when we need to cut things manually, and this steel square makes that a breeze! Line one edge up with your paper, and your perpendicular cuts will be a perfect 90° every time!

Also, a bonus tip:
When you're cutting, never use a plastic ruler as a straight edge!
A steel ruler gives you a better edge without the risk of cutting into your ruler. I won't lie, I've damaged my share of plastic rulers by thinking, "It'll be fine just this one." It never is. Don't even try it! :D


On the other hand, a plastic t square ruler like this is good for drawing perfectly perpendicular lines. But remember: This is not a cutting tool!


This tweezer set also seems like something you wouldn't assume is a crafting tool. However, as I seem to be saying a lot, these things are useful in so many situations! They're great to have on hand, to assist in placing small or delicate accents especially.


Yes, Fabri Tac is intended for use on fabrics. However, it's also good for anything that's a bit difficult to glue. I specifically bought mine for mounting card stock onto glitter paper- none of the glues I had on hand would work, so I went to the internet for answers. The overwhelming answer to "what glue works on glitter papers" was Fabri Tac, so I bought some and OMG I'm glad I did!


The other glue I find I can't do without is Alene's Tacky Glue. It works so nicely on so many surfaces. I hate the idea of running out, so I always keep a spare in my craft room!


And if you're brand new to crafting and want a set of Cricut tools all in one space, Amazon has you covered. You can get a basic set of tools, or a set of tools for sewing, a set for weeding, or a set specifically for vinyl!

Wow, that was a heck of a post to write! I feel like I wrote a book...

I hope this list can help you out. Obviously you don't need everything on this list, but I listed the tools I use almost daily, the ones I keep on my craft table at all times.

Have I missed any tools you can't do without? If so, share them in the comments... I'm a bit tool-obsessed, so help feed my need! :D

Until next time...

Monday, March 12, 2012

CND Green Scene

Happy Monday, everyone! I hope yours is better than mine... I'm missing a funeral because I'm sick. Oh yea, it's loads of fun in the Layniefingers house! But even though I have the plague, I couldn't help but show you the newest polish I got in the mail!

The lovely folks at CND were kind enough to send me a bottle of Green Scene, and it's absolutely perfect for St. Patrick's day! This green is rich and opaque- you're looking at one coat!

This polish applied so beautifully. It's buttery smooth, and practically applies itself! I'm sure you could do two coats for maximum coverage, but I found one coat was perfect!

I love the color, as well. It's the perfect kelly green, warm and mid-toned, not too dark and not too light. If I were going to design a basic green polish this would totally be it!

Once I'm feeling a bit less like death, I'll experiment with stamping it, or stamping on it. But for the moment, all I want to do is to curl up in a ball and sleep til I'm not sick anymore.

I can try, right?


Green Scene retails for $9 and is available at cnd.com.

EDIT:  I got energetic earlier and decided to test out how well Green Scene would stamp. Turns out it stamps beautifully... look at that butterfly! It's rich and opaque, and absolutely gorgeous!

This is definitely a new favorite of mine...

Polish was provided by the manufacturer for consideration.
See my disclosure statement for more information.

Monday, March 5, 2012

Another way to do a sponged gradient!

Ever have a day when you see something that totally changes how you look at something? Yea, that was me last night. I was browsing nail stuff online (as I so often do) and came across people doing a sponged gradient in a totally different way. (See here and here for examples.) It looked much easier than the tutorial I just wrote, and it looked just as good (if not better)! I had to try it out!

This is so much easier than the method I've been using. The tutorial can be summed up like this:
  • base coat
  • 2 coats of white
  • 2 coats of gradient stamping
  • top coat
And that's it! You cut a piece of sponge the size of your nail (or just paint an area the size of your nail), paint stripes of the colors you're using onto your sponge, then pat-pat-pat the sponge over your nail all at once. The gradient basically forms itself, and you're left with a very messy gradient that goes all over your fingers!


I sent a link to my friend, needing to share my excitement over this find. She didn't believe that it could look so smooth and pretty. Then she did it- she challenged me to prove to her it could look that smooth and soft. What could I do?

I pulled out my China Glaze Electropop collection and started painting. I only did one nail, as a proof of concept, and WOW was it messy. There's really no way to avoid getting the polish everywhere unless you tape off your fingers like you would do for a water marble. I'll have to try that next time...

Still, the one nail I did turned out beautiful. This wasn't enough for her... she didn't think it looked smooth enough, so I added a layer of topcoat over everything to meld it together.

Even though I know how much topcoat can pull a manicure together, I was still blown away at just how smooth this gradient was! It was so easy, and so pretty. That's one stamped coat of rainbow goodness on my index finger there, and it's absolutely gorgeous.

She was pretty gobsmacked too. She couldn't believe how fast and easy it was to get a gradient look like this. She's definitely looking at her ombre nails kit differently now.

So of course, I needed to do a full manicure like this, but I was too lazy to deal with 5 colors like I had in my test run. I ended up sticking with three pastel shades- I'm fairly sure I used Dance Baby, Sweet Hook, and Kinetic Candy.

As you can see, it worked beautifully. The stripes on the sponge really didn't look all that soft and gradienty, but on the nail? Gorgeous pastel softness. I'm just blown away at how smooth the transition is!

Cleanup was an utter nightmare, much like trying to clean up a water marble is. I used cotton swabs, brushes and acetone, and still had a horrible mess to clean up. Still... it's SO worth it!

I can just see doing all my nails in rainbows. You could also do angled gradients or vertical gradients, based on how you apply the colors on the sponge. I really am in love with this look!

Although now I'm thinking it would be fun with a pattern over it- I'm thinking zebra stripes, or maybe leopard print. My husband laughed when he saw it and said my nails look like easter eggs.

So, what do you think of this look? Would you wear it? Would you change it? Would you put a print over the top of it? Leave me a comment and let me know what you think of it...


So many awesome ways to create pretty results!
See my disclosure statement for more information.

Wednesday, February 22, 2012

I absolutely love a good sale!

Ahhh, holidays. One of my favorite holiday traditions is hitting the post-holiday sales. Stores invariably overstock with holiday merchandise, and once the big day has come and gone most of that merchandise will end up deeply discounted.

This year was no different. Last night my husband and I went walking at WalMart and I decided to look through whatever items happened to be left in the Valentine's day section. I'm so glad I did...

See, the day after Valentine's day (or any other holiday, really) WalMart usually knocks 50% off the prices of whatever merchandise is left. After a few days, they generally knock it down to 75% off. Last night, I found several goodies that were 75% off, and brought home what you see to the right!

While I was happy about the string glitter, I was especially excited to find the rhinestone sticker. I've had a theory for a while now, and was looking forward to testing it.

The full price of this sticker was $0.98, but with the sale it was a whopping $0.24! I decided that even if I couldn't get the rhinestones off the backing, I could simply trim around them and apply them to my nails that way. Sure enough... it worked!

Unfortunately, the silver backing came off a few of the rhinestones when I pulled them off the backing. That's easily fixed, though... I'll dab a bit of silver polish onto the back of the stones before I use them. Problem solved! So for 24 cents I got 74 rhinestones in various shapes and colors... not bad!

The glitter came in packs of 4 and were $0.20 each, so I picked up two. I do have two duplicates (red and purple), but I really like the colors so I'm not complaining too much. The little pots they come in are pretty sweet, too!

All together, I ended up with everything you see in the photo to the right. 20 cents each for the 2 sets of 4 colors of string glitter, 29 cents each for the 2 sets of 4 micro glitters, and 24 cents for the rhinestone sticker- that comes out to a fantastic price of $1.23! Color me giddy, because I'm still grinning ear to ear!

Remember- you can find nail art goodies everywhere, from the Dollar Tree to WalMart to the thrift store. All you need to do is keep your eyes open!

Til next time!

My husband laughs at me when I get giddy over a sale!
See my disclosure statement for more information.

Monday, February 13, 2012

More Valentine's Nail Designs

Hi again! This is a quick update without much to say, but I wanted to share some more Valentine's Day nail designs with you! These would be good for an accent nail or for all your nails...


So what do you think? I'm really digging the black set at the bottom...

Some polishes were provided by the manufacturers for consideration.
See my disclosure statement for more information.

Tuesday, February 7, 2012

Nontraditional Valentine Nails

I'm not all that into Valentine's day. I've never been a fan of pink, and I think people should tell their loved ones how they feel more often than once a year. I'd much rather get a bouquet of flowers to celebrate Thursday, or slow dance in the rain just because we can.

However, I know I'm probably in the minority there, so I figured I'd try some nail designs to celebrate all things hearts and flowers. Then there were these designs, which have the right colors but seem to be missing the hearts. (They're also missing skill, but hopefully you guys can forgive me for that...)


I fully intended to write down all the polishes I used for these, but ended up using WAY too many polishes while I was working. Seriously, my husband came in while I was painting, shook his head at seeing the bed covered in polish bottles and nails on skewers stuck in styrofoam to dry, and walked back out. He might have said something about me making a giant mess, or how stinky the polish was, or maybe how crazy I am.

It's ok, he knows how artists are. He's one too!

I have to admit, I'm really liking the dotted nail. Those colors really make me happy! Maybe pink isn't so bad...

Polishes may have been provided by manufacturers for consideration.
See my disclosure statement for more information.

Monday, February 6, 2012

Dr.'s Remedy Valentine's Delight

Dr.'s Remedy Valentine's Delight
Reds to Rock Your World


Romance rising: that's what February 14th is all about, indeed. This Valentine's Day, we dare you to take the shade of love to a whole new level, compliments of Dr.'s REMEDY Enriched Nail Polish. How to choose the hue de you? The sky's the limit (in terms of red); just reach for one of these red-hot tints to entice and ignite your inner flame. Your tips and toes will thank you, no doubt.


This Valentine's Day Delight collection of Dr.'s REMEDY Enriched Nail Polish red shades includes:


REVIVE Ruby Red: A shimmer-infused, Wizard of Oz-inspired shade of crimson

RESOLUTION Red Glitter: A red-meets-copper spin that's sequin-look-alike laden with high-shine and sparkle


RESCUE Red: A classic fire engine red

Dr.'s REMEDY Enriched Nail Polish is available for $17 online at www.remedynails.com.


Dr.'s REMEDY is a line of doctor-inspired cosmetics that is dedicated to using clean, hypoallergenic ingredients. The brain-child of two New York-based podiatrists, Dr. Adam Cirlincione and Dr. William Spielfogel, Dr.'s REMEDY proves quintessentially-perfect for any person looking to better the condition of her skin and nails. Dr.'s REMEDY is sold exclusively at www.remedynails.com or by calling 877-323-NAIL.
Press release provided by Dr.'s Remedy.
See my disclosure statement for more information.

Wednesday, December 22, 2010

Happy Holidaze the seventeenth- they weren't ALL winners...

Hi again! I've shown a lot of fun looks of varying degrees of difficulty in the last few weeks. Some were more successful than others, but I'd like to think that all of them were decent. However, tonight I'm going to share with you the designs I feel weren't quite so successful- the fails.

Everyone does it. No matter what the medium, if you're working at learning a craft you will have projects that turn out badly. There will be cakes that don't rise, woodworking projects that don't fit together correctly, paintings that are unrecognizable. It's part of the learning process, and it's totally ok to fail.

However, most people will shake their heads and say, "Whew, I'm never doing THAT again." They're thankful no one has to see their mistakes, and they carry on happily. I, on the other hand, think it's fun to haul out the horrible projects, the ones that make people say, "Good grief, Laynie, what were you smoking to come up with this?!" These aren't quite that bad (although I've had some that are), but they're still nothing I'd want to wear in public.

First, let's look at the humble snowflake. You saw the one that worked, but you didn't get the see the two prior trials that didn't quite work. See, I had envisioned these tiny snowflakes gently floating down from the sky, stark white against the evening sky. Unfortunately, my first attempt looked more like snowflakezilla, ready to eat the town and the inhabitants before letting out a large, snowy belch.

It wasn't good.

"HELP, the giant mutant snowflake is going to eat us!!"
I'm still not quite sure why it turned out so large, so blobby, so shapeless. I used a tiny brush, the same brush I've painted tiny details with in the past. But this time, it just got bigger and bigger, until it was... well, until it was what you see here. "It's ok," I thought to myself, "I'll try something different..."

I'm not sure what I was thinking here...
Do I have an explanation for this? Umm... no? I didn't even have a dotting tool at that point, so I used something I'd decided would work as a stand in. It didn't, really, as you can see. those are the wonkiest dots ever, and speaking of dots... since when does a snowflake look like dots?

I have no answer. I did, however, realize that this just wasn't working. I knew it needed... I don't know, something. Help is clearly what it needed, but no, I wasn't going in that direction. I decided to do what I always do when I'm not sure something isn't working:  I added glitter.

It didn't help.

Moving on...I also tried to do a plaid look. This one isn't horrible, but my color choices aren't the best, and I think I needed to try it on paper first to make sure I got all my overlaps right. All I know is that this is just not pretty.

Yes... it's definitely sort of plaid... ish...
To be fair, the photo is a touch dark, but I think you can tell that this just didn't turn out nicely at all. The lines are so LARGE! The overlaps are also confusing as heck to me. I'll end up playing with this on paper one day and see if I can come up with a better look once my new nail art brushes come in, but that's a story for another blog post. Don't worry, they should be here soon. :D

I also tried a Christmassy look using both red and green on the nail and trying to put silver scrollwork between the two colors as a divider. The idea isn't horrible, but man, the execution just failed miserably.

Poor, pathetic attempted swirlyblobs. You could have been so beautiful...
Can you see where I was going with these? It's a cute idea, with lots of shimmer and pretty and a touch of silver. But man oh man, it just didn't WORK! I can't even explain why it didn't work, but it definitely didn't, and when I tried to touch it up it kept getting worse and worse. This one I ended up cleaning up before I could snap a picture of it, so you don't get to see the silver bar as wide as the "scrolls" that I ended up removing! I bet you can imagine it just perfectly, though!

But I've saved the *cough cough* best for last. This one... I'd explain it if I could, but I don't even remember what I did to make it so damned ugly. It's black polish with gold glitter and more black polish. Lots of black polish. It's like an uber-goth Christmas. After someone's dog died.

♪    It's Christmas and I'll cry if I want to...   
So just remember- it's absolutely ok to fail, and it's ok to paint a nail design so ugly that even brain-damaged chimpanzees with a seizure disorder could do a better job. It's only nail polish, and it comes off. Relax and have fun with it!!

Oh, and one more thing... don't try these at home. They're pretty icky. :D