Showing posts with label Christmas. Show all posts

Wednesday, December 25, 2019

My favorite tools and things

Merry Christmas, Happy Holidays, and any other festive greetings that might be appropriate! I'm going to assume that some of you have received crafting goodies from the holiday gift exchange, which is awesome! However, sometimes you need additional tools, so I'm here to share my favorite tools with you!

Some of these aren't the exact tools I use, but they're similar enough that I feel comfortable sharing them with you. Also, these are all Amazon links, and I am an Amazon affiliate. So, if you buy something through these links, I will receive a small commission. This will not affect your price, but it will help fund my crazy crafting. :D

Let's break down what these are and what I use them for!


This dental pick set is super useful for my Cricut crafts. The sharp tips on the pointy pick are fantastic at getting into tiny spaces when you're trying to weed a piece. The handles are a bit small, however, so you could add a rubber pencil grip onto them to help make it a bit more comfortable.


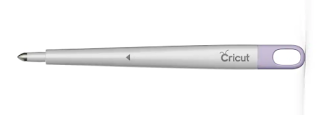
The Cricut scoring stylus can be helpful. However, I think there are better ways to use it. Keep an eye on this blog, because I'll be sharing my scoring techniques soon!


This hole punch is amazing! I use it for all sorts of things, from making my own sequins and punchinella/honyeycomb ribbon to book binding to leather crafting to... well, just about anything you would want to put a hole in! It comes with 6 different hole sizes and is much, much stronger than your average office supply hole punch. I can't recommend this one enough!


Ok, I'm fairly sure you guys know what this one is. But if you haven't gotten your Cricut Explore Air 2, this is a pretty good time to get it. It is freaking amazing, so versatile, and ... well, I may be a bit obsessed with it. However, if you're wanting even more versatility...

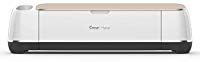
...you could go with the Cricut Maker instead! And in all honesty, as amazing as the Explore Air 2 is, the Maker is just worlds apart a better, more versatile machine. Yes, it's more expensive, but I think it's definitely worth the extra cash!


Also, you can't go wrong with more mats. I have several, and I find having multiple mats really streamlines my work flow. I can load multiple mats at once, so I don't have to weed a cut immediately before starting another cut. Plus, you need different mats for different media, so it's good to have at least one of each kind.


This palette knife set is something I wasn't sure I'd use that much, but holy cow do I love it now! I originally bought it to help me remove cuts from my mats, but I use it for so many things now! They're perfect for mixing paint. If I'm making my own glazes they work for measuring powdered pigments as well as for mixing those too. They spread adhesives beautifully... they're just such a useful tool for so many scenarios! I can't recommend this one enough.


If you don't have a craft knife, I highly recommend getting one. They are very useful, and for more than just cutting things! I've used mine for weeding teeny tiny bits out, for separating the back from a particularly difficult sticker... and for many other things I can't really remember at the moment. They're useful. You need one!


I also absolutely love my dotting tools. They too are useful in a multitude of situations! They work well for putting dots of paint on either projects or your nails, they're decent for mixing things, and I just might have turned one into a scoring tool for my Explore Air 2! Again, keep an eye on this space, because there will be a video coming of my technique for that as well.


I know, this doesn't seem like a craft tool. But trust me! It's awesome! First off, it's fantastic at helping get glitter off of your skin. Regular tape works too, but a lint roller is just so much more convenient! It works for clearing gunk off your mats too, or for getting glitter and things off of your craft table. My favorite tip, though, is that in a pinch, you can pull a fresh sheet off and use it as transfer tape for your small vinyl cuts!


There are times when we need to cut things manually, and this steel square makes that a breeze! Line one edge up with your paper, and your perpendicular cuts will be a perfect 90° every time!

Also, a bonus tip:
When you're cutting, never use a plastic ruler as a straight edge!
A steel ruler gives you a better edge without the risk of cutting into your ruler. I won't lie, I've damaged my share of plastic rulers by thinking, "It'll be fine just this one." It never is. Don't even try it! :D


On the other hand, a plastic t square ruler like this is good for drawing perfectly perpendicular lines. But remember: This is not a cutting tool!


This tweezer set also seems like something you wouldn't assume is a crafting tool. However, as I seem to be saying a lot, these things are useful in so many situations! They're great to have on hand, to assist in placing small or delicate accents especially.


Yes, Fabri Tac is intended for use on fabrics. However, it's also good for anything that's a bit difficult to glue. I specifically bought mine for mounting card stock onto glitter paper- none of the glues I had on hand would work, so I went to the internet for answers. The overwhelming answer to "what glue works on glitter papers" was Fabri Tac, so I bought some and OMG I'm glad I did!


The other glue I find I can't do without is Alene's Tacky Glue. It works so nicely on so many surfaces. I hate the idea of running out, so I always keep a spare in my craft room!


And if you're brand new to crafting and want a set of Cricut tools all in one space, Amazon has you covered. You can get a basic set of tools, or a set of tools for sewing, a set for weeding, or a set specifically for vinyl!

Wow, that was a heck of a post to write! I feel like I wrote a book...

I hope this list can help you out. Obviously you don't need everything on this list, but I listed the tools I use almost daily, the ones I keep on my craft table at all times.

Have I missed any tools you can't do without? If so, share them in the comments... I'm a bit tool-obsessed, so help feed my need! :D

Until next time...

Tuesday, December 21, 2010

Happy Holidaze the Sixteenth- Holy crap, there's a lot of these! I mean, let's trim the tree!

I have a confession to make. Because of circumstances this year, I haven't decorated my home for the holidays at all. I haven't even put up a Christmas tree, which part of me misses but the most of me thinks, "Meh, it's more work using energy I just don't have. Save that energy for something I care about." So this tree is the only one I'm doing this year... good thing it's a cute one!

Woo! A Christmas tree, complete with entirely too many ornaments.
I'm not sure how I feel about this one, but hey... it's a tree, right? :D

I have to share a bit of the process with you as well. This thing was time consuming! I think it'd go faster if I had some appropriate nail stickers, perhaps some sparkly thread to replace the sequins I used to make garlands. But if you're not a fiddly person, this won't be the nail design for you. What's worse, I knew this would be a design I wanted to make an animation for to illustrate the process. But this thing was complex. I sat down and counted (thanks to the counting tool in Photoshop) and there are 82 layers in all, and the animation has even more frames* than that!

So, how do you make this monstrosity of a nail? Well, first you get a chicken...

I kid.

You will need some supplies if you're going to do a nail like this one. Keep in mind, you can substitute all sorts of things, and you don't actually need any of the extra stuff I used. I just used them because I thought they'd be fun. So... what all did I use?

You'll need:
  • base coat
  • a background color (I used a beige and a glitter topcoat)
  • at least three greens (I mixed greens using my base green and other polishes to darken & lighten them)
  • a gold polish for the star
  • a flat star cutout sequin thing
  • flat gold sequins or glitter for the garland
  • nail gems for the ornaments
  • quick-dry topcoat (a must for this sort of design!)
 
Christmas Tree Nail Art Process:
  1. Apply base coat.
  2. Apply your background polish. 2 coats is usually enough, but use your best judgment.
  3. Optional: Apply a layer of glitter topcoat over the background color.
  4. Paint the basic shape of the tree using your medium green polish.
  5. Using your darker green, paint in some shadow lines on the tree shape.
  6. Using the lighter green, paint in some highlights on the tree shape.
    1. These shadows and highlights are just to add some texture to the background tree. They won't be terribly noticeable, but they still add a bit of interest to the background so it isn't so flat.
  7. Using a small detail brush, paint a gold star with your gold polish. You can stop here if you like, or continue on.
  8. Optional: Place a star cutout on top of the gold painted star to add dimension.
  9. Add the garland.
    1. Paint a strip of clear nail polish where the first string of garland will go. Use a dampened manicure stick (or whatever tool you prefer for applying stones and glitter) and apply individual glitter pieces along the garland line. Apply them one by one for the jeweled look I achieved.
    2. You could use a striper polish instead and sprinkle microglitter over the wet stripe of polish for a fuzzier garland look.
  10. Add your rhinestone ornaments.
    1. Dab a spot of clear nail polish where you want the rhinestone to go.
    2. Pick up the rhinestone with your tool of choice, then press it into the clear polish. Press slightly firmly so that the polish slightly indents and rises up around the sides of the stone, so that it will stay in place better.
    3. Repeat with more stones til you've got the look you want.
    4. Optional- you can leave off the rhinestones and simply use a dotting tool to add ornaments to your tree. Glitter polishes (or even sprinkled glitter) would look fantastic!
  11. Seal the embellishments and nail art in with a quick-drying top coat such as Seche Vite or China Glaze Fast Forward.
Seems so simple on paper, doesn't it? Actually, it is simple, as long as you break it down into tiny steps. If you can glue on a rhinestone or paint a stripe, you can probably do this. You may want to leave out the hand-painted star, though... *grin* The rest is just figuring out where to put stuff.

Remember, if you try this, leave me a note, because I'd love to see it! Morgan from Pass the Polish Please did an absolutely adorable version of my Santa nails, and it totally made my day to see it! So definitely link me if you try one of my designs!

Now, I'm off to have a cup of hot cocoa and snuggle with the husband for the evening. Hope y'all have a great night!

*Not that this has any importance at all. I love doing the blog and making animations, and frankly I've had bigger, more complex files than this. I just find it amusing that this particular file took me so much time. Do people really read these footnotes? If you did, that means you're super awesome and I love you to bits! You should respond with a comment saying something silly, like maybe, "Wow, that's cool, but it'd be even more awesome with a squid ornament!" You know, something weird like that!

Nail gems, sequins, and star were provided by Viva la Nails for consideration.
See my disclosure statement for more information.

Friday, December 17, 2010

Happy Holidaze the Twelfth- It's a Fat Man's Red Suit!

You know, today's design is one of my favorite designs I did for the holidays. It's just so cute, so festive, so FUN! Sometimes you need to head back to the classics, and so I did. I was inspired by Beauty Judy's Santa Nails, only I needed to do them my way. Santa needed some serious sparkle!


That's right- instead of using creme colors like Judy did, I went for super-sparkle. I used my Heaven polish in Ruby for the red because it is absolutely the most gorgeously intense red glitter polish I've ever seen. Everything else was Art Deco stripers in black, white, and silver. The glitter on the white is from the glorious (and messy) glitter samples I wrote about the other day. It looks pretty fab on, doesn't it?

How to make Santa suit nails:
  1. Apply your base coat.
  2. Apply (at least) 2 coats of red polish.
  3. Apply a white strip down the center of the nail.
  4. Apply a white french tip the width of the center white strip.
  5. Paint a thin black band across the center of the nail. This will be Santa's belt.
  6. Make a small silver rectangle across the black band. This will be the buckle on Santa's belt.
  7. Paint a thin silver line starting from the center of the silver rectangle. This will be the bar/latch of the belt buckle.
  8. Let everything dry. Then paint clear polish over the white sections and
    sprinkle with white or clear glitter, just to add sparkle.
  9. Apply top coat to seal and protect.
That's it... it looks sort of complex, but when you break it down step-by-step, it's really very simple. Lots of designs are, once you break them down! I'd wear this on my own nails right now if they were long enough, but they end about where Santa's belt ends right now. My nubs are SAD!

Remember- if you try a version of one of my designs, leave me a note and a picture! I'd love to see what you do! I know y'all can totally improve on my stuff! :D

Sunday, December 12, 2010

Christmas Shopping With Layniefingers!

I can't believe how close we are to Christmas. This year has absolutely FLOWN by! Every year my dad asks me for a list of things I want, and so I've been browsing on the web. I've seen some cute things, both big and small. I figured I'd share some of the cute finds with you!

First off, I am absolutely NUTS about penguins!! Since I don't do so well with cold weather, I've been really digging the fleecy pajama pants. Target to the rescue! Look at this adorable set of Nick and Nora penguin pajamas! OMG, I could die happy in those. Or perhaps you're more into the footed pjs, in which case this set from Pajama City has you covered... totally covered! (ha ha, I crack myself up... totally covered!!)

Ok, maybe you aren't a pajamas kind of person. Maybe you like shiny things, in which case Dreams of Glass should be right your style. They make handmade lamp-worked jewelry that is absolutely stunning. I really, really like this pendant- the blues and purples sparkle in such an eye-catching way. It's pretty, but not over-the-top... it's totally me! Plus, it comes on a totally sweet 1.5mm Sterling Silver Box chain, so you don't have to worry about what to put it on.

Finally, there's the top of the list, the thing I want most but wouldn't really expect anyone to buy for me. Well, except maybe Bill Gates or some other uber-rich celebrity who wants to donate to the poor. *grin* I have had my heart set on a new Nikon DSLR for ages. Don't get me wrong, I would be totally happy with a D5000, which is still pretty expensive but OMG it shoots HD MOVIES!! But if I'm dreaming, why not dream big? Look at the D3X- it is a photographer's wet dream, $8000 worth of it. But omg, it would be so sweet...

So Bill, if you're watching, I've been a very good girl this year! If you wanna play Santa, you know where I am!


Friday, December 3, 2010

Happy Holidaze the twoth!

Wow, I am absolutely blown away by the response to yesterday's post! You guys really like this nail art thing, don't you? Since you don't seem to mind me doing a single nail along with a demonstration of how it's done, I may try and see if I can do more nail art, even when I'm showcasing new polishes or whatever. I think that could be doable... what do you think? Worth the effort? :D

Today's holiday nail art is something for Hannukah. I have so many Jewish friends, and I absolutely love how blue and silver look together. That made today's nail art almost do itself!


As always, you can click the picture to make it bigger, if you'd like to see more detail. One thing I've found myself worrying about while doing nail art is the need to make things perfect. But if you look closely, you'll see that this is far from perfect- the dots aren't all perfectly round (I still don't have a dotting tool- shhh!), my stripes are irregular and sometimes overlap. But it's still pretty, and the whole look works well together as a whole.

So don't be afraid to try something like this. It really is a lot easier than you would think. Be patient, don't try to go too fast, and remember to brace your hand with your little finger while you paint. That step alone can make painting so much easier!

Also, like yesterday, I have an animated gif to help you visualize the steps of putting a look like this together. I'm trying something a bit new with it- I've labeled the steps to help you see what's going on, because there really is no good way to paint glitter. :D

To recreate today's nail, you'll need a few supplies:
  • base coat
  • a blue polish of your choice
  • white and silver stripers OR
  • white and silver polish & a skinny brush
  • clear polish to adhere glitter pieces & rhinestone
  • dotting tool
  • a manicure stick (for placing glitter & rhinestone)
  • silver glitter
  • a rhinestone
  • top coat
  1. Base coat. Always do a base coat.
  2. 2 coats of your background color- blue, in this case. For this nail, I used Sally Hansen Ultra HD Laser, but feel free to use any deep blue you like.
  3. Once your background is dry, paint white four slashes across the nail starting from the bottom corner. They fan out like a flower, almost. I used my Art Deco Illustration Nails paint in white.
  4. Use your dotting tool to paint white dots between the slashes. Do as many as you like. At the outer edges, I only had room for 2-3, but I did 5 on the inner sections.
  5. I decided the design needed a bit more punch, so I added silver stripes along the bottoms of the white stripes. Just use your striper (or your striper brush and your silver polish) to paint slashes along the bottoms of the white ones. I used my Art Deco Illustration Nails paint in silver.
  6. Once the white and silver are dry, sprinkle a tiny bit of glitter onto some paper. Paint a small amount of clear polish onto the first silver stripe, then place single glitter pieces in a line along the edge. Use the manicure stick to pick up and place the glitter pieces one by one. Repeat along all the silver stripes.
  7. Use a bit more clear polish at the base where all the stripes begin. Place a single rhinestone on top, covering the junction and dressing up the look.
  8. Let everything dry a bit, then coat with your favorite top coat. I used 2 coats of Seche Vite.
Repeat this for as many or as few nails as you like. It's a bit tedious, but it really isn't difficult. The main thing to remember is that you can do it if you practice! And even if it doesn't work out (believe me, not all of mine are keepers!), it's just nail polish!

You could customize this in several ways. First, you could change any of the colors and still have it look gorgeous. I can see this being downright amazing with black, silver, and red! You could also skip the careful application of glitter pieces and instead use a glitter striper. Instead of the rhinestone, you could put a big dot of glitter, or a nail decal. Nail art is endlessly customizable, and you should never be afraid to change things up.

I hope everyone has had a great week, and that you're heading into an even better weekend. Give someone something to smile about today! ♥

Thursday, December 2, 2010

Happy Holidaze the first!

 Hello, my name is Laynie and I'm a nailartaholic.

Knowing the holidays were swiftly approaching, I sat down over the weekend to make a few nail art designs on nail tips. I figured I would do 3 or 4, maybe 5 max, so that I would be a bit ahead for the blog. Then I got carried away.

I was having fun. I was absolutely bursting with ideas, more than I could keep up with, truthfully. I jotted down some ideas on paper, so I could get to them before I forgot them. Then, I started to work.

By the time I had finished, I had 30 different looks. Like I said... I got a bit carried away. There's everything from subtle to in-your-face bling. So keep an eye out, we'll be doing lots of holiday nail art!

First up is a look I think is appropriate for everyone, no matter what winter holiday you celebrate. This nail art takes the lights from your tree, your house, or your decorations and puts them on your nails!


It's silly, it's fun, and I can't look at this one without smiling. I showed it to a friend of mine who immediately thought it was complex, so I decided to do an animated image to show you the process. It's time-consuming, but not complex at all.

You'll need to gather your supplies together before you start, so you don't wind up digging for bits halfway through with wet nails. You'll need:
  • base coat
  • the background polish color
  • a black nail art pen (or whatever color you want the cord to be)
  • striper polishes, nail art pens, or an art brush and various polish colors for the lights
  • top coat to protect your art
First, put your base coat on. This is standard no matter what you do.

Next, use a nail art pen (I used my Sally Hansen Nail Art Pen in black) to draw a meandering line across my nail. I then drew shorter wiggly lines to fill in the blank spaces. These black lines will be the cord of the lights. I made sure to leave room for the various lights.

Then, use various striper polishes to paint lights around the nail, making sure the fat end of the light was against the "cord." I used red, blue, green, pink, yellow and silver. You can use whatever colors you want, as many or as few as you want.

Finally, add a coat of top coat to protect the art you just made. It really is that simple!

If you want to jazz it up, you could use individual nail art gems for the lights, or you could use various colors of glitter polish to add some sparkle to the lights. You could also do this on a different colored background- sponged greens to resemble a Christmas tree, black to resemble lights at night, or white to look like lights against snow! You could use a single meandering line that makes its way across all of your nails, or do a single nail for accent. You could even do the black line across the tip of your nail and make a french tip of lights! You're the artist, you can do whatever you like!

Happy Hannukah for those of you who celebrate, and happy Thursday for the rest of you!


EDIT: I worked up a few examples of variations in Photoshop. Hope you enjoy!
 
Some polishes were provided by the manufacturers for consideration.
See my disclosure statement for more information.