Showing posts with label zebra. Show all posts

Sunday, April 15, 2012

Princess P-Nut's Zebra Nails

Ahh, weekends! We went to our friend's house again yesterday and this time I brought my nail polishes with me! I'd planned to do nails for more than just her daughter, but the fibro monster reared its head and said, "Nope, you're done!" At least I was able to get hers done!

We decided to call her Princess P'nut, courtesy of her mom. They'd seen my video on making sponged ombre nails and P'nut was really wanting rainbow nails. She also loved the zebra, so together we picked out the colors for her gradient. She chose different colors than I'd used, and I think they worked well together!

She also chose to put rainbow sparkles over the rainbow gradient but under the zebra stripes, unlike the way I'd done mine. I used Jessica Silver Holographic topcoat for the sparkles this time. I love that polish!

Since I'd left my acrylic paints at home, I used Princess P'Nut's acrylic craft paints to do the zebra stripes. As you can see, they came out just as well as with my artist's grade acrylic. Proof that you don't need to spend a ton on acrylic paints!

However, it's obvious that even though I brought my cleanup brush, I'm just not as good at cleanup on other people as I am on myself. I clearly missed lots of stuff, but my that point I was pretty tired and shaky. Ah well, it'll come off in the bath!

Princess P'nut absolutely loved her nails, and kept looking at them off and on. I was so happy! I love sharing the fun of nail art, and she definitely enjoyed it!

The rest of the day was lots of fun too! P'nut's mom made burrito fixings, and those were absolutely delicious! Then she'd made a blackberry cobbler, and we brought chocolate chip cookies. Way too much deliciousness... but who's complaining?

I can't talk about visiting without mention the snugglebunny animals. When I first sat down, Rico ran over and hopped into my lap! He let me scritch him for 10 minutes or so, then was finished. Cats are so mercurial!

Later in the day, we all went to sit in the grass and watch the chickens play in the leaves... such cuties! My husband snapped this gorgeous shot of Rico blatantly ignoring the chickens. He's so beautiful!

There's just something about orange cats that I love. I've yet to meet an orange tabby that wasn't a sweetiepie!

Finally, I have to share this picture of Boo the dachshund. Poor baby had been lying on the back sofa cushions and ended up slipping down behind them. He tried and tried to get out, but his little legs were just too short! Meanie that I am, I just had to get a picture of him looking so dejected.

We helped him up not long after this photo was taken. Surprisingly enough, he ended up sitting on my lap for a good two hours! Normally if his favorite person is home, he's sitting with her. But even though she was home, he'd decided he was snuggling me instead!

At one point, he'd been lying with his front half draped across my lap. He stretched and rolled over onto his back, with his little front legs sort of poking into the air, and he leaned his head back and started making the cutest little wheezy whimpers of contentment! I was absolutely squeeful!

So yea... yesterday was filled with lots of laughter, good food and good friends. You can't ask for more than that!

There's a reason I'm not a nail tech.
See my disclosure statement for more information.

Friday, April 6, 2012

Rainbow Zebra- how to do the zebra print

Whew, I finally got this one edited and uploaded! Here's the second half of the rainbow zebra tutorial... Hopefully it makes sense!


I love the metallic sparkle of the left nail. It's sponged over silver, as opposed to the right which is over white.

I love zebras. They're cute!
See my disclosure statement for more information.

Tuesday, March 20, 2012

Rainbows and Holos and Zebras, Oh MY!

Tonight, I am exhausted. I didn't sleep last night, and I only napped for a couple of hours this afternoon. Then, I taught a 3 hour guest-lecture in my husband's photoshop class. It was loads of fun, but now I have not only used up my spoons, I've borrowed from next week's spoons. I am utterly and completely spoonless.

So, instead of writing up how I made what I'm wearing, I'll simply post pic spam. Let today be known as Spammy Tuesday! If you have questions about how I made this, just ask.


Jessica Holographic Topcoats were provided by the manufacturer for consideration.
See my disclosure statement for more information.

Tuesday, February 14, 2012

It's animal print mayhem!

Several colors on this nail were
custom-blended to achieve the
look I wanted. So much fun!
Hi again! Today I've just got one nail design to share with you, but it's one I've fallen in love with! I've got such a love for animal prints, and I wanted to do something more than the typical look.

I painted the zebra and giraffe sections as soon as I'd figured out what I wanted, but the top segment stayed empty for several months while I tried to figure out what to paint there. I'm still not sure it works, but I'm definitely enjoying the look of it!

I'd share the polishes I used to make this, but I custom-blended several of them. Also, since it's been so long since I started it that I can't remember what polishes I used! I really need to start keeping a spreadsheet of what polishes I use to make what colors and which nail designs...

Yea, right... I'll add it to the list of things I need to do, then promptly forget about it!

So, what do you think about this one? Would you wear it? Would you like to see a tutorial on how I made it? Leave me a comment if you want a tutorial, I might be persuaded...

I maybe crazy, but it's fun!
See my disclosure statement for more information.

Tuesday, June 28, 2011

Animal Print Week (continued): Rawwr!

Ok, this isn't all that different from your typical tiger print. Still, I wanted to jazz it up a bit, so I used my uber-gorgeous black glitter to hit the black stripes, giving them an understated sparkle that is seriously fun.

It's pretty easy to do, too! Start out with your favorite orange polish as the background color. I'm really partial to Deborah Lippmann's Lara's Theme. This orange is like a traffic cone! Add in some tiger stripes with the black of your choice- you could use a simple Art Deco striping polish in black, or a Migi NailArt pen. The Sally Hansen Nail Art Pens in black would be perfect for this too! It's really not brand-dependent.

The fun comes once you've got the base design created. I added glitter in two ways. First, I added a single stripe of sheer shimmer down the center of the nail using Love My Nails Dazzling. Then, I mixed some black microglitter with clear polish and touched it to the black stripes. This added some depth and subtle sparkle to the black stripes. Love it!

I added a coat of Seche Vite over the whole thing and then admired my sparkly tiger manicure! Fun, no?


Be good, and I'll see ya next time!

Some polishes may have been provided by the manufacturer for consideration.
See my disclosure statement for more information.

Friday, October 22, 2010

Do You Love Minx Nails? You'll Love These As Well!

Some of you may have noticed by now- I'm pretty frugal. I prefer the term frugal over cheap, because I like to think it's a positive thing. I mean, I'm disabled and don't have a job, so it's probably a good thing that I can make my money go far.

Unfortunately, this means when I see a trend like Minx, two things happen. First, I start thinking of how cool they are, and how much I want to have them myself. Then reality kicks in and I realize that 1- I have no where to wear them, and 2- even if I did, my nails are too short to look worth a darn with them, and 3- even if I had someplace to wear them and the nails to make them look good, I don't have the money to get them. Then I'm sad, because you know... no Minxy goodness!

You can imagine my excitement, then, when I found these Fashion Diva chrome nails from Broadway! Actually, when I first saw them I was a bit unsure... they seemed sort of cheesy to me, sort of fake. I assumed they would be silver all the way through and would look like you stuck plastic nails on your hands. I just wasn't really feeling them.

"Those are cute! Where can I buy those?"

Lots of places, actually! Major drugstores carry them- WalMart, Rite-Aid, Walgreens, CVS, and the like carry Broadway nails. Just look in the cosmetics section where the other artificial nails are!

I decided I needed to try them for myself. Instead of using the pink glue that came with the kit, I used Kiss Mega Hold Press-On Tabs, which are so convenient! They're a glue alternative for full-coverage artificial nails that are much more gentle, and they don't require filing your nail bed before application! Removal is super-easy as well: simply soak your nails in warm water for a few minutes, then gently lift the nails off starting from one edge.

The down side is that they only last one day, but I'll definitely take that for the ability to wear gorgeous artificial nails without damaging my natural nails! I was really impressed by not only how easy they were to apply, but also at just how strong they are. I haven't yet tried to wear these all day, but I don't think I'd have much problem, other than trying to get used to suddenly having long nails. :D

Speaking of nails, let's get back to those, shall we?

These nails are freakin' hot, people. I had problems photographing them because of just how shiny and chromey they are, but believe me when I say these are like having mirrors on your fingers. There's no way you could get a polish that's this shiny, it's just not possible. They look like Minx, except that instead of spending $40 for a set that can only be worn once, you're spending around $6 for a set of nails you can wear over and over again!

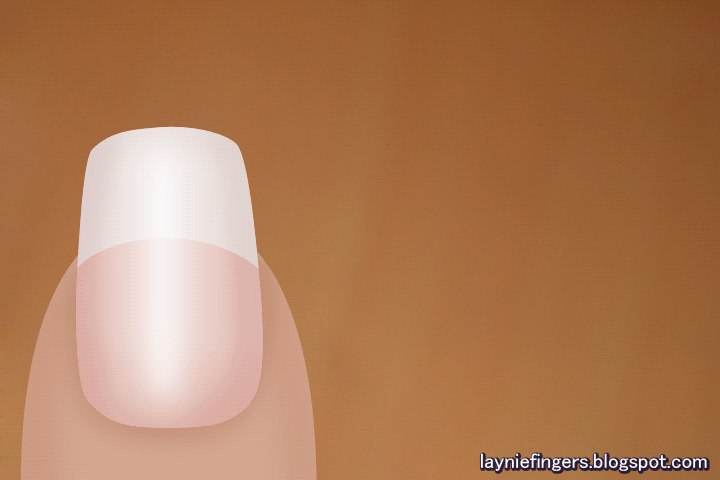
"But Laynie," you ask, "sure they're gorgeous on top, but what about underneath? Won't they look silver and stupid and cheap, like kiddy nails?"

 Please, like I'd not tell you if that were the case. No, the people at Broadway thought of everything with these, and thankfully they're a nice natural-looking creamy off-white underneath, just like a natural nail would be. Now, obviously they won't pass for your own if someone takes your hand and studies your nails mere inches from their own nose, but truthfully? Who does that?

"But Laynie, they have square tips! What if I don't like square tips? Or what if they're too long? I can't handle nails that are too long!"

What do you do if your own nails are too long? You file them down into any shape you like, and you can do that with these nails too! Ovals, square, or even stiletto nails (although they'd be really short stilettos!), it's entirely up to you. Honestly, I can't even begin to explain how much I love these!

And because these are simply too gorgeous, and because I had such a hard time photographing these, I had to take more photos than usual to share with you. I know, this blog is photo-heavy compared to my normal ones, but can you blame me? Look at them!! They're almost hypnotizingly beautiful... I couldn't stop looking at my nails! It was like they were calling to me. "Laynie... look at us... looooook at usssss.... we're so shiiiiiny... we're so beauuuuuuuutiful!"


For approximately $6 you get a pack of 24 nails in 12 sizes and 2 patterns (plain chrome and zebra print) and a small container of pink nail glue. Kiss Mega Hold Press-On Tabs are approximately $2 for 48 tabs in multiple sizes. That's enough for 4 manicure applications, which means you can wear these nails 5 times for $8: four temporary wears for 1-3 days and one semi-permanent wear for up to 7 days! You can't do that with Minx!


These were provided by the manufacturer for evaluation purposes.

Friday, July 16, 2010

My Nail Tips Are On Etsy!

I've spent the last week arguing with myself as to whether I should do this or not, and I finally decided to just go for it. I've put my nail tips on Etsy! Ok, I only have 4 sets up, but I love them, and I hope that someone else will, too! So, this is a quick post to show you what's up, and how to get to it. Just click the pic, and you'll go to that particular listing!


So, if you're interested, definitely click the links. There are more pictures at the listings. If you don't wanna buy but you like them, click the "heart" link. It'll make my day!

Tomorrow you can see my fail nails. They would have been so beautiful... but I took pics anyway!

Happy Friday, everyone!
<3 Laynie

Thursday, July 1, 2010

A zebra of a different color...

Well, I am SO EXCITED! I have finished my first set of artificial nails, and I do think I'm in love with them! Not only are they rainbow... no, they are rainbow zebra!! These nails aren't for wallflowers, or for people who like to blend in with the crowd.

I painted these using acrylic paints, mixing colors to get just what I wanted. They're a bright rainbow, starting with a bright purple at the cuticle, shifting to cyan, lime green, bright yellow, hot orange and finishing with magenta at the tips. Black stripes overlay the rainbow, and they're topped off with a deep gloss that makes me absolutely giddy. I modeled the photos by using a bit of poster putty to hold the nails on, so that they can be worn for real after I snapped a few photos. Such a shame, my poor pudgy hands aren't the best models for these babies! :D

The neurotic thing? I didn't do 10 of these. No, I made these hoping they'd be perfect for someone else, although I'm not sure who that'd be. But since I don't know who this person is, I decided to be generous and do a full set of 20 nails. That's 2 nails each in sizes 0-9. Yea, I was going a bit cross-eyed at the end, there, but I'd hate to have someone end up with nails that didn't fit!

So, these will go back into my box of nail goodies until I've built up a few more sets. Then I'll figure out if I should try eBay or etsy or what. Any suggestions?

In the meantime, I've got more nails in progress. I've got another rainbow set that I'm still deciding what to top them with. I'm considering a cheetah print (filling the spots with white), or maybe another zebra set. It's fun to hand paint! I've also got a set of gradient nails, but... that's another post entirely!!

Here's hoping your day is filled with love, laughter, and great nails!