Showing posts with label orange. Show all posts

Friday, August 16, 2013

Jessica Fall Collection- a quick preview!

Enlarge this photo, it's worth it!
Wow!! I checked my mail a couple of days ago and was excited to find an unexpected box from Jessica Cosmetics. I'm not sure if you're aware of this, but I absolutely ADORE Jessica polishes. The range of colors is fabulous and the quality is unbeatable. I couldn't wait to tear into this box and see what was there!

I wasn't disappointed. In the box was a set of 12 polishes that included the Fall 2013 collection and the Jessica Effects- Glitzy collection. That's right, it was a collection of glitter polishes that made my eyes almost pop out!

Oh yea, that's a LOT of testing!!
I was so excited that I had to experiment immediately. I pulled out my favorite notebook and began swatching on paper, and I was absolutely in LOVE!! (This page also includes the swatches from the latest Zoya collections. Expect a post on that soon as well!)

Seeing all of these colors together just made my afternoon, and I fell in love with two of the polishes. Usually when I get a collection, I let it sit for a while to come up with ideas that work with the colors. But not this time...

No, this time I couldn't wait to tear into this set and start wearing them. I started with two coats of Jessica Overture, a rich coppery, sparkling orange. I topped that off with a coat of Jessica Sizzle, an absolutely amazingly beautiful red glitter. The glitter in Sizzle comes in three sizes- a moderately large hex, a smaller hex, and then tiny pieces that are still larger than the microglitter in a lot of polishes.

These colors go so well together! I wasn't sure if red glitter over orange/copper polish would work, but ZOMG it SO DOES!! This is one of those manicures that just keeps me looking at my nails, loving how the light plays across them.

Of course, all this sparkle and shimmer made these nails almost impossible to photograph. I'll try to get some better ones tomorrow, but I'm not promising anything.

I've got the nails painted, so hopefully I can get the review of all the polishes up soon. I was just so happy that I had to share this! Hope you like it too.

Til next time!
Polishes were provided by the brand for consideration.
See my disclosure statement for more information.

Saturday, November 3, 2012

Building a Design on a Background

Yesterday I posted photos of a nail design that was in progress. I could have happily worn that design on its own, but I wanted to add another design element to it. I decided to go with a tropical theme and add some big flowers.

I worked on two nails this time, one with a pastel gradient and one with the white pinstripes over the pastel gradient. I used creme polishes in bright pink and orange for the large flowers, and then added smaller flowers in a light dusty blue. I used deeper tones of pink and orange to add a bit of dimension to the flower centers, then used tiny white dots to help tie everything together. I also added leaves in a couple of shades of green to help fill in blank space. I did same thing to the nail with the white pinstripes.

Comparing the two, I think the nail with the pinstripes is a bit more finished-looking. I'm not sure why, but I feel like the white lines somehow add more of a unified feel to the design. That's always a good thing, right?

Now I find I'm wanting to experiment with another floral design, this time all in pale pastels. What's wrong with me?? *laughs*

I'll leave you with more photos of the pretty...


Some polishes were provided by the brand for consideration.
See my disclosure statement for more information.

Wednesday, October 31, 2012

One Last Halloween Nail Design

I know this is last minute, but I love this design so much I had to share it. I wanted to do sort of a take on candy corn but with a twist. This bright beauty is what I came up with, and I am absolutely in love with it!

This one isn't difficult to do, but it is fiddly. First I painted the nail with pink, orange, and yellow. I went with vibrant, almost neon colors because I wanted a strong, graphic look to them. I also didn't worry about a neat line, since I wanted that sort of candy corn feel to it.

Once that layer was dry, I very precisely laid out stripes using three pieces of striping tape next to each other, then skipping around that much space and adding another three pieces side-by-side. This gave me much thicker lines than I would have had just using the single pieces of striping tape. However, you could use whatever size tape you like.

I then painted the entire nail with a black creme polish. I pulled the tape pieces off while the polish was still wet, being careful not to smear the still-wet black. I let this dry for several minutes before adding a coat of quick-dry topcoat. That sealed the colors together and let them look glassy and seamless.

Can I just say how much this design makes me smile?? Seriously, I want to do all my nails like this! The bright colors look all the more bright next to the black, and I think thinner lines of color contrasted with thicker lines of black could be a fun spin on this idea. Clearly, I have some experimenting to do!

Speaking of, I may have some nail sets up for sale soon, so if you're looking for some sparkly nails for the holidays I just might be able to help you out! Keep an eye on this space... :D


Some polishes were provided by the brand for consideration.
See my disclosure statement for more information.

Saturday, October 20, 2012

I'm Seeing Stars

I've got another Halloween nail design for you! I wanted to do something with a bit sparkle to it for this design, but at the same time I didn't want it to be too complex. I think I hit just the right balance with this one!

Instead of trying to paint stars and keep the glitter in the spots I want it, I went the opposite direction. I started this nail out with a bright, deep orange. Once that was opaque I topped it with a golden-coppery glitter and added a coat of quick-dry topcoat.

I then let things dry for half an hour or so. Once things were dry, I took a piece of masking tape and punched little star holes from it. Those stars are the key to this manicure!

A quick tip: Make sure the sticky side of the tape is facing the opening of the punch instead of toward the die-cutting part. This way you can use tweezers or a dotting tool to remove the star cutouts.

While I was punching my stars, I stuck them to the edge of an Altoids tin to keep them organized and sticky. Once I had them punched, I applied them to the nail in a simple pattern. I tried to leave enough space between them to make sure they would show up as stars in a black background. It also helps with removal to have a piece of the star hanging off your nail.

Once my stars were in place, I topped things with a coat of black nail polish. I used an opaque black so I would only need one coat. Before the polish dried, I peeled the stars off leaving the bright orange sparkly stars behind. I let this dry for a minute or two, but I should have waited longer because I did smear the edges of my stars on one side.

Once your top coat is on, you're done! You could do this with any shapes you want- even round dots from a traditional hole punch would look adorable!

Leave me a comment if you like this one. I'm really enjoying it right now!

Some polishes were provided by the brands for consideration.
See my disclosure statement for more information.

Wednesday, October 17, 2012

Another Halloween Nail Art Design

Today's halloween look is super simple and super easy. Again, instead of being an obvious nod to the holiday, this design uses halloween colors to get you in the holiday mood.

I started with a bright orange polish. You can use whatever orange you have, which means you can go with a pumpkin tone or a neon orange, a pastel orange or anything else that makes you smile. I went with a very saturated orange, but not quite neon.

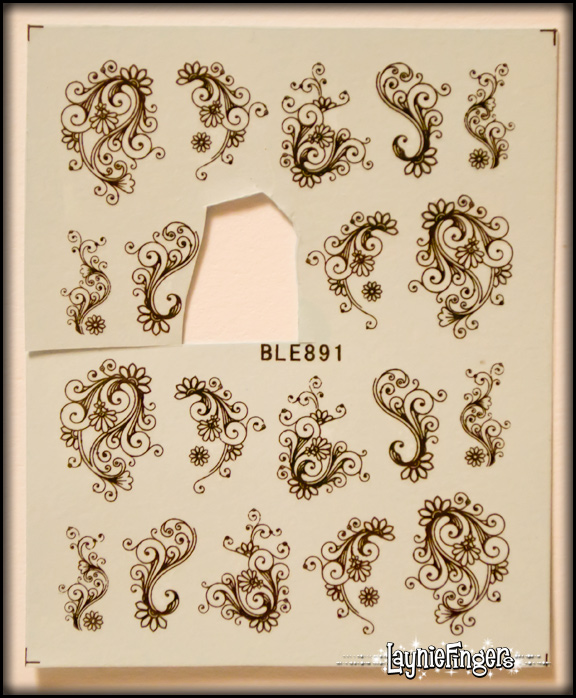
Once that was totally dry I added a beautiful water transfer from the WDBLE981 set that's available at KKCenterHK. I absolutely love these decals! I love that there are many choices in one style, so that your nails don't look so obviously done with decals.

I'm also very glad to share that these decals acted much more like the decals I'm familiar with than the last set I used. Thankfully, these slid right off the backing once it was wet. Then I was able to slide them onto my nail and position it the way I wanted.

Keep in mind that these water decals will continue to slide around whenever they get wet, so you definitely need to top them with topcoat. The clear topcoat helps meld them with your nail polish so that they aren't going anywhere.

Once again, after I got the decal in place I wanted to add a rhinestone to give it a bit of flair. What can I say, I love shiny things! This stone came from the Fing'rs Nail & Body Jewels kit. I really like this kit because the stones are tiny and you get such a great selection of shapes and colors.

Once everything's on and mostly dry I added a coat of ProFX to protect everything. I really like the end result. This could be a beautiful accent nail or you could do all your nails with these decals. Whatever you do, they'll be pretty.

So go ahead, play with your nail art stuff. You may end up with a design you love!


Some polishes were provided by the brands for consideration.
See my disclosure statement for more information.

Thursday, October 11, 2012

Halloween Nail Art

Halloween is coming, and I wanted to share some nail art designs with everyone! I've been experimenting with some nail tips, and I've come up with a variety of designs. I'll be sharing these designs over the next couple of weeks. Hopefully these will give people some more ideas for Halloween.

This more traditional design uses black, orange, and gold in a nod toward the holiday. It's simple to do: paint the nail with a shimmery orange, then add stripes in black and gold. I finished with some black hexagon glitter pieces as an accent.

I've got a doctor's appointment today, so I'm going to cut this short and try and sleep a bit. Wheee!

Halloween is my favorite holiday!
See my disclosure statement for more information.

Monday, October 1, 2012

A fun floral look

While using the camera flash, the colors
are washed out but you can see the depth
of the blue background.
Whew, I just woke up from sleeping almost 24 hours! I'm not exaggerating, either. My husband was in the hospital over the weekend, thankfully for a false alarm. But I spent 3 days "not sleeping" on the awful pull-out loveseat, being worried sick and waking up every time something beeped. In short, I didn't really sleep for 3 days.

I'm super-thankful, though, because my husband is ok! All the tests showed that his heart is strong and healthy, so now we get to follow up with the primary care physician and go from there. We can do that. I just want to keep him around. 20 years together is a good start, but he can't go anywhere yet. :D

The good news is that while we were waiting (and waiting and waiting!), we came up with a TON of great blog ideas! Since it's going to take me a while to get them started though, you get to see this older nail doodle I did and then forgot to post. Oops!

This is actually a very simple look to create. Let me list the polishes I used before I get started, just to make it easier.
  1. Nutra Nail Gel Perfect in Two-Step
  2. Jessica Strawberry Shake It from the Gelato Mio! collection
  3. Jessica Tangerine Dreamz from the Gelato Mio! collection
  4. Jessica Lime Cooler from the Gelato Mio! collection
  5. Zoya Evvie from the Designer collection
  6. Orange loose glitter
Natural light shows the actual colors of
the polishes I used.
I know, it looks like a lot. It's easier than it seems, though, I promise! I started with Two-Step (1) to create a gorgeous background with a lot of depth. I then put down a drop of both Lime Cooler (4) and Evvie (5) next to each other, then
dipped my brush into both. This let me slightly mix the two, but still get striations of both colors through the leaves and stems. I think this gives an interesting look to them.

For the flowers, I put down a large drop of Strawberry Shake It (2) on my palette, then used my large dotting tool to make 5 dots in a circle around the top of each stem. I went back with a bamboo skewer and drew from the center of each dot to the center of the circle the dots made. This gave me a five-petaled flower at the top of each stem!

To complete my flower, I put down a dot of Tangerine Dreamz (3) in each flower center. After that dried, I realized I wanted a bit more sparkle there, so I put a dot of clear polish on each flower center, then put a bit of loose orange glitter on top of the clear polish. Unfortunately, it went everywhere, and I didn't notice that until after I'd put a coat of Seche Vite over everything. That's why there are bits of glitter on the petals and the stems.

Overall, I like this. It's fairly simple to do once you get started, and it's a fun happy design! You could use any background and flower color you like!

As for what's coming up? Stick around, it could get fun in here!

Polishes were provided by the brands for consideration.
I make no money from the links provided. They're just for your convenience.
See my disclosure statement for more information.

Monday, February 13, 2012

More Valentine's Nail Designs

Hi again! This is a quick update without much to say, but I wanted to share some more Valentine's Day nail designs with you! These would be good for an accent nail or for all your nails...


So what do you think? I'm really digging the black set at the bottom...

Some polishes were provided by the manufacturers for consideration.
See my disclosure statement for more information.

Tuesday, February 7, 2012

Nontraditional Valentine Nails

I'm not all that into Valentine's day. I've never been a fan of pink, and I think people should tell their loved ones how they feel more often than once a year. I'd much rather get a bouquet of flowers to celebrate Thursday, or slow dance in the rain just because we can.

However, I know I'm probably in the minority there, so I figured I'd try some nail designs to celebrate all things hearts and flowers. Then there were these designs, which have the right colors but seem to be missing the hearts. (They're also missing skill, but hopefully you guys can forgive me for that...)


I fully intended to write down all the polishes I used for these, but ended up using WAY too many polishes while I was working. Seriously, my husband came in while I was painting, shook his head at seeing the bed covered in polish bottles and nails on skewers stuck in styrofoam to dry, and walked back out. He might have said something about me making a giant mess, or how stinky the polish was, or maybe how crazy I am.

It's ok, he knows how artists are. He's one too!

I have to admit, I'm really liking the dotted nail. Those colors really make me happy! Maybe pink isn't so bad...

Polishes may have been provided by manufacturers for consideration.
See my disclosure statement for more information.

Monday, November 7, 2011

My Halloween 2011 Nails

Sometimes I think it's weird to make graphics like this.
Then I think about the rest of my life and think this
is about as normal as I get. :D
A VIDEO!! OMG, I cannot even begin to explain how far I've come in video editing-land, and how far I have yet to go. Still, I'm so happy to have this finished and ready to move on! I'm hoping to keep moving forward with this, because I do like being able to have video with my posts. Let's be honest, I'm a total ham and I love being able to talk to you!

This process, though? So confusing. Who knew it'd be so hard to do a voiceover for video? (Ok, I know... I've done it, so I know, but still!) I ended up having to script half of it, play the soundless video while I recorded my audio into my video camera, then move that video to the computer, download the latest version of Audacity so I could strip the sound from the video, then cut it up into chunks I could then place in the video timeline. Oh, and I had to download FFsomething or other libraries too, and install them.

Sound confusing? Yea, that's because it was! But it's DONE, and now I sort of understand what I'm doing, so I'm going to start editing the next video tomorrow! Maybe it won't take me three years to get finished... :D


So, on to the pretty stuff... the nails! Oddly enough, I wasn't interested in doing anything too flashy or anything, partly because I was running out of time and partly because I was really wanting to try the gorgeous polishes Melissa from the Daily Nail surprised me with. She'd noticed I've been down and not posting as much lately, so once day I checked the mail to find the cutest package all bundled up in orange paper waiting for me!

I'd be lying if I said I kept my cool. I alternated between squealing in joy and wiping tears away because it was such a touching gift. She filled it with all sorts of goodies, and I've kept them all in their box for now, to decide what to do with them. But Halloween was the perfect time to try two of them... Sally Hanson Salon Black Orchid and NYX Pink Avenue.

Black Orchid is a fairly basic polish, a deep charcoal grey shimmer that is lovely on its own. It's not totally black because the shimmer plays with the light a bit, but I like this. I also like that it's a cool-toned charcoal without any warmth to it. It's a typical Sally Hansen Salon polish- good coverage, good wear.

Pink Avenue was the star of this show, though. NYX definitely made a winner with this one, a mix of glitters in a clear base. It's a combination of lime green and orange flake glitters paired with microglitter in the same colors. I think some of the glitter changed colors in the light, depending on the angle, but it was hard to tell.

Regardless, this was a stunning polish, and I couldn't resist adding three coats of it, just to build the sparkle to insane levels. What can I say, subtlety is not one of my strengths!

The end result was almost impossible to photograph! Even the video didn't quite capture the way the light played with the glitter. It was hypnotic, and I was in absolute love! My niece loved it too, and wanted me to do her nails... shame I didn't have it with me, or I would have!

Since it's 5:30am and I haven't been to sleep yet, I'll let the rest of the photos speak for themselves. Click' em for larger pics. They're worth it!


So... thoughts? Too glittery? Not enough? Let me know what you think in the comments.

Polishes were provided by Melissa at The Daily Nail because she's AWESOME!
See my disclosure statement for more information.

Sunday, July 31, 2011

Seeing Spots- some nail doodling to tide us over...

Hi y'all! I'm still coughing my fool head off and feeling gross, so I dipped into my photo archives to share something I did not too long ago while I was doodling. Sometimes I enjoy just putting various polishes together to see what I can come up with.

I'd love to tell you what polishes I used for this design, but I can't. Most of those colors I mixed myself from various polishes in my collection, and I honestly don't remember how I achieved them. However, this is a very simple look to achieve.

First, I imagined a V going down the center of my nail. I painted the three base colors, one in each triangle. After that dried, I began adding dots with whatever color I thought would mesh well with the backgrounds. I started with the large silver center dots on the turquoise bit, then added smaller pink dots on top of the silver ones. Finally I filled in the blank spaces with the sparkly blue dots. The side triangles are more simple. Finally I added black stripes to better separate the three sections. A quick coat of topcoat finished things off!

Hopefully I'll be feeling enough better to get a post up soon. If not, I'll dig into the archives again! Til next time!


The robots are coming to take me away!! :D
See my disclosure statement for more information.