Saturday, March 3, 2012

Penguin Skittles Fail

Once again, it was time to see my pain management team. For the first time in months, I felt up to doing a fun manicure for my doctor's visit! Unfortunately, this time it just wouldn't work the way I wanted it to.

I've been itching to try to do something rainbow-inspired since I got the China Glaze Electropop collection. The colors are just so vibrant and fun! I wasn't up for anything too detailed, though, so I decided to do a skittles manicure, then paint penguins on top of it.

Instead of using nail polish for the details, though, I decided I would use acrylic paints instead. I've got some ideas I want to do and I think acrylics would work much better, as well as being easier to correct if I totally make a mess of things. This would be a great way to get used to using acrylics, right?

Clearly, I need lots of practice. From what I can tell, my paint was much too thick, and I was trying to get the details opaque with one coat. Bad idea! Then, I added top coat before the acrylic paint was completely dry which made the paint do weird cracking things and make bubbles. After that, I added another coat of topcoat to try and smooth things out and added even more bubbles!

This was a total mess... but at least I've learned something. Oh, and to add insult to injury, I photographed it last night and figured there was no harm in removing it. Then, when I got the pictures in to crop for the blog post I found that only two shots were usable- the two I combined for the pic in this post.

Oh well... better luck next time!

Painting is HARD!
See my disclosure statement for more information.

Friday, March 2, 2012

Custom Nail Decals Redux

Do you remember that post I wrote a while back about making your own custom nail decals with nail polish and scrapbooking punches? Then I wrote another post with a photo, implying I had something fun to show you if it worked out?

I've still been fiddling with them, trying to see just how much I can do with them. The verdict is in... they're lots of fun! Turns out they're even more versatile than I thought, which means lots of fun for everyone!

So, what would be a fun way to embellish punched nail decals? Since I had an adorable cupcake punch, I decided to play around with those. It was a perfect chance to fiddle with multicolor polish strips. Once I punched out my cupcakes, I wasn't happy with them, though. But then I realized they needed something else- the proverbial cherry on top, if you will.

I pulled out my plastic bags again, along with some clear nail polish and the adorable Fingr's Flirt nail and body jewels kit I'd been sent ages ago to evaluate. Those are the cutest little gems, tiny and perfect for nail art! I put a tiny dot of clear polish onto the bag for each cupcake, then pressed it gently into place so that it wouldn't be moving around. Then I added a tiny dab of clear polish onto the top of each cupcake and pressed a stone onto each one to represent a sparkling cherry (or other cupcake decoration). Once that had dried, I added a coat of topcoat to seal everything together and held my breath.

As you can see, they worked out wonderfully! I wanted to make sure there wasn't a lot of excess clear polish around each decal, so I used my cleanup brush with some acetone to remove any extra that had gathered around the edges of the decals. I also added different embellishments to some hearts and butterflies. Some got gems, some got glitter.  All got a coat of topcoat and cleanup afterwards.

I found out you can really play with the dimensionality of the decals once they're set up like this. For the tiny heart I mixed some Isis brand glitter in the color Coral Beach from Nail de Royale with clear polish into a thick paste, then mounded it onto the tiny heart. To my surprise, it stayed mounded once it was dry! So cute... I may have to make some more of those...

This pic should give you an idea of how large these decals are... that's my index finger it's sitting on! So teeny and cute... I love it!

I also experimented with another substance for decals. I didn't like how the nail polish decals can crack, or melt and smear with topcoat. I started thinking, and realized I've had success peeling acrylic paint off of my palette once it's dried. It was time to experiment some more!

As you can see, they turned out nicely! I had some old cheapie acrylic paints that came with a kids' art project years ago. They were super-thick with age, so I smeared them onto my plastic bag with a craft stick and let them dry.

Some of them turned out pretty thick, but it was still proof that the idea works. These decals end up
sticking well to the plastic bag, so I didn't have any problem with them getting stuck together or cracking or anything. And with a dab of clear polish, I was able to combine decals for bold color, or to add rhinestones or glitter to them. I am SO in love with these!

So there you have it- even more options for creating your own nail decals! I've had much too much fun making these, and now that I know I can use my acrylic paints? I may need more storage just for the mini punches I plan to acquire!

I know, I know, it's a sickness... but at least it's a productive one!

Various items were provided by the manufacturers for consideration. Links are in the post.
See my disclosure statement for more information.

Thursday, March 1, 2012

Monochromatic Medly

Hi again. It's still all kinds of pukey at my house, so we'll look at another blast from the past. Anything to distract me, yes?

This design is another monochromatic look. I was again looking to show that you don't need a ton of colors or tools to make pretty nail art. I think it worked decently!

The steps for this one are simple, and could be switched up easily based on whatever you have on hand. You don't need a lot to do this.

Supplies needed:
  • base coat
  • three shades of nail polish: a dark shade, a medium shade, and a light shade.
  • accent pieces
  • top coat
  • something to make blobs with
For accent pieces, you could use just about anything: glitter polish, glitter in various sizes or shapes, striping tape, rhinestones, flat-backed pearls, or stickers. This would be gorgeous with a line of tiny swarovski crystals accenting the line, or with little flower rhinestones. You could also accent a few of the light-colored blobs with glitter polish for a bit more shine. What can I say, I'm all about the glitter!

It breaks down something like this:
  1. Paint your nails with your base coat.
  2. Paint your nails with your darkest color. For this design I used black.
  3. Paint one corner with your midtone color. I used silver.
  4. Paint splotches of your lightest color over the darkest color. I used white.
  5. Add a line of accent pieces along the midtone color. I used silver holographic rhombus glitter from Born Pretty.
  6. Add topcoat.
A design like this can also be tweaked to fit different situations. You could replace the spotches with little hearts for valentine's day, use purple green and gold for Mardi Gras, use earth tones for fall or pastels for spring. You could use tiny flower stickers in place of the white blobs, or shiny hearts.

It really is up to you, and can be silly, bright or elegant. I worked up quite a few variations, just to give you an idea of just how versatile this type of design is!


So again, I feel like I can't say this often enough: experiment! Play with your polishes, try things out together. Try different colors together to see if they work, and if you like it, go for it! It's only nail polish, and no mistakes are permanent!

Til next time!

Rhombus glitter was provided by Born Pretty for consideration.
See my disclosure statement for more information.

Wednesday, February 29, 2012

It's better to give than to receive...

My husband is laughing at me. He thinks it's cute when I get so giddy over packing things up to send to people. I don't know why, but I absolutely LOVE putting together little gifts for people!

That brings me to the subject of this post: my giveaway winners!

Congratulations to Thalie and Stefanie! They each won a prize pack, and I might have slipped a couple of other goodies in there, just because I love to share things. You know... maybe. *wink*

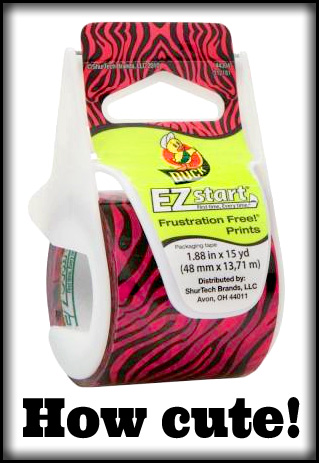
Speaking of things I love, let me just say how much I love my new packing tape! It's made by Duck, and is the cutest pink and black zebra pattern! I feel like it makes my packages just a bit more fun, just a bit more happy. 

A bit more like me, really.

I've seen this tape in the store lots of times, but never could justify the almost-$3 it costs. But now I have packages to send, and I need to make sure they're secure, right? Hey, that's my story and I'm sticking with it...

Good thing I bought it, too, because although I was super-careful packing the giveaway prizes, after I was finished I saw that one of the boxes had fallen out of the envelope. Thankfully, I was able to cut into the package, replace the wandering box, and seal everything up again with my tape. Yay!

Anyway, it's almost midnight and I really should try and get some sleep. I've got more goodies in the works, so check back soon!


Giving gifts is so much fun!
See my disclosure statement for more information.

Tuesday, February 28, 2012

The Dotted Line- an experiment in black and white nail art...

Man oh man, was last night rough. I think I should be sleeping right now, but I'm too tired to think about it. I was up all night with nausea and praying to the porcelain god, and I didn't even have the fun of getting drunk first! Oh body, why do you have to be so eager to host such disgusting viruses?

As a result, the fun nail designs I've been working on are stuck in a holding pattern while I get over this ick. Good thing I've got some stuff in the archives I hadn't posted yet! Today I'm showing a look I did with black, white, and silver holographic glitter. I mean hey, glitter is good for everything, right?

Don't answer that... :D


This is a super-easy design and you don't need that much to do it with! I used my Wet n Wild white polish, a silver from a Sally Hansen gift set I grabbed a couple of years ago on sale, a black striping polish, silver holographic rhombus glitter from Born Pretty, and a black stone from Viva la Nails.

It's super simple to do, too. I'll list the steps in order...

  1. Base coat. Always always always use a base coat to protect your nails and make your manicure last longer!
  2. Paint entire nail white. Use 2-3 coats to ensure opaque coverage.
  3. Paint one side of nail silver. I painted around 1/3 of the nail silver.
  4. Paint black stripe dividing white and silver. This can be as wide or as narrow as you want.
  5. Add white dots down the black stripe. I used a dotting tool, but you can use a bobby pin, a toothpick, a ball point pen... use what you've got!
  6. Add silver glitter pieces in the shape of a flower. If you don't have the glitter, you can paint flower petals on.
  7. Place a black stone in the center of the flower shape.  Again, if you don't have the stone, you can paint a dot, or use a drop of glitter polish, or a piece of glitter from a glitter polish. Do what you like, make it your own!
Of course, this could be done in any colors you like- pink and blue, red and black, green and yellow... That's one thing I love about nail art... you're free to pull inspiration from anywhere, and tweak it til you like it. Have fun with it, it's only nail polish!

Til next time!
The glitter and stone were provided by the shops listed in exchange for an honest review.
See my disclosure statement for more information.

Sunday, February 26, 2012

Stamping with the China Glaze Electropop Collection

Sometimes the best intentions just don't work out the way you'd hoped. I received the entire China Glaze Electropop collection from Dolly's 1500-follower giveaway yesterday and absolutely fell in love. This collection is so bright!! It's like they made it specifically for me!

Of course, the first thing I tried with it was stamping. Unfortunately, this look started bad and just kept getting worse. I've done worse manicures, but this one is just not my favorite, by a mile.

Lots of sparkle, and even some out-of-focus-ness
to show that gorgeous holo hex glitter!
I started with a coat of my usual Qtica Natural Nail Growth Stimulator, then did two coats of NYC Oyster. This made my hands look a bit odd, but I knew I was going to stamp on it. I added a coat of NYC Pink Avenue for sparkle, which was nice. I'd like it more over other polish, though. (Both Oyster and Pink Avenue were part of a surprise gift from Melissa at The Daily Nail.) Then, because I wanted still more sparkle, I added a coat of China Glaze Techno!

Finally, I was ready to stamp. Picking colors was hard- I wanted them all on my nails, but I decided to stick with the most vibrant of them. Unfortunately, most of the colors I used were just too pale to really show up. Wicked Style (the bright pink) works nicely, but the rest just disappointed me.

Here you can sort of see Electric Beat (the blue) near the cuticle. The flash of blue at the free edge of my nail is a piece of holographic glitter in Techno. So sad...

I took photos of the rest of the fingers too, though. I only stamped my left hand, because the stamping wasn't looking pretty enough to replicate on my right hand. So, I'll let the other photos speak for themselves.


Oh well... it was worth a try! I still have ideas kicking around in my head, and now I know Oyster just doesn't look good on me. Knowledge is power! ;)

Til next time!
 
I love winning blog giveaways!!
See my disclosure statement for more information.

Friday, February 24, 2012

More Adventures In Stamping With the Salon Express Nail Stamping Kit

Ok, just ignore the photo from yesterday where I was trying to get the hang of stamping again. Turns out, all I needed was a polish that stamps well and a bit of practice!

The problem is, I was stamping onto Glitter Gal holographic polish with metallic polish, so it was HORRIBLE to photograph! But two photo sessions and much time in Photoshop later, I have a few shots to show you how well the stamps work.

Keep in mind, I've heavily edited the images to make them viewable. But I haven't touched the nail parts of the photos, and I've got a before shot to show you the difference.

Ok, enough yapping... let's get to the pics!

I should have moisturized, but I was so excited...
This shot actually shows four stamps, although it's hard to tell. The first finger (from left to right) has a flower in Heaven Creamsicle, but it doesn't show from this angle. Trust me, it's pretty.

The middle two fingers are a old franken I made myself. It is GORGEOUS, and even more clear than it seems in this photo. Seriously, I'm LOVING this polish for stamping!

The pinky has a portion of a butterfly, but for the life of me I can't remember which polish I used for it. My memory sucks...
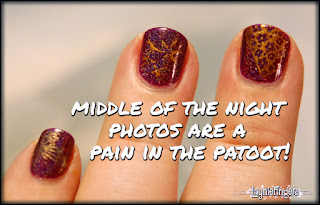
So hard to see... *sighs*
I stamped these fingers first, so I was still getting the hang of it again. Still, you can kind of see what's going on here. The pinky is stamped with NYX NP 47 Le Prive, which is a really gorgeous duochrome, a slate/steely blue polish that shifts to a pale gold. Melissa at The Daily Nail sent me a care package of a bunch of fun gorgeous polishes around Halloween, and this is one of the beauties she included. Love it! I bet it'd be STUNNING over black!

The middle two fingers are stamped with a Maybelline matte metallic gold polish, and although you can't quite see the designs in this shot, the ring finger has what appears to be bamboo, and the middle finger has a portion of a rectangle with cutaway flowers in it. This looks really fun and funky in person, and I can see using the "full nail" designs like this in the future.

Ahhh, here we go. This is a pretty horrible shot, as it (like the others in this post) was taken in low light using available light instead of flash, because I was trying to keep the holographic reflectiveness of the Glitter Gal Purple Holographic from totally obscuring the stamping. With lots of color correction and a bit of Photoshop magic to make my cuticles not look so disgusting, we've got a somewhat presentable photo.
Unlike the original. This is a great example of how I edit my photos. I will always tweak the color balance on my pictures to try and reflect something more resembling what I see, rather than what the camera sees. I have no problem cleaning up the raggedy cuticles I always seem to have, because really, who wants to see that?

But I do NOT retouch the actual nail art part of my photos. That's a point of pride for me, really... I want you to see what I did, not what I wish I'd actually been able to do. When I do make Photoshop mockups, it's always clearly marked, and it always looks like Photoshop instead of my real nails.

I'm not the best nail artist by far, but I do want to present MY work, not some fantasy drawing. So... yea, that was quite a rant... oops. :D

Anyway, the bottom line is that I LOVE THIS STAMPING SET!! Honestly, if you have any interest in getting into stamping, this is the way to get started. Check your local stores for their as Seen On TV products, and you can play too! And again, please share what you've done. I wanna see!

Til next time!

Blah blah was provided by the manufacturer for consideration.
See my disclosure statement for more information.